
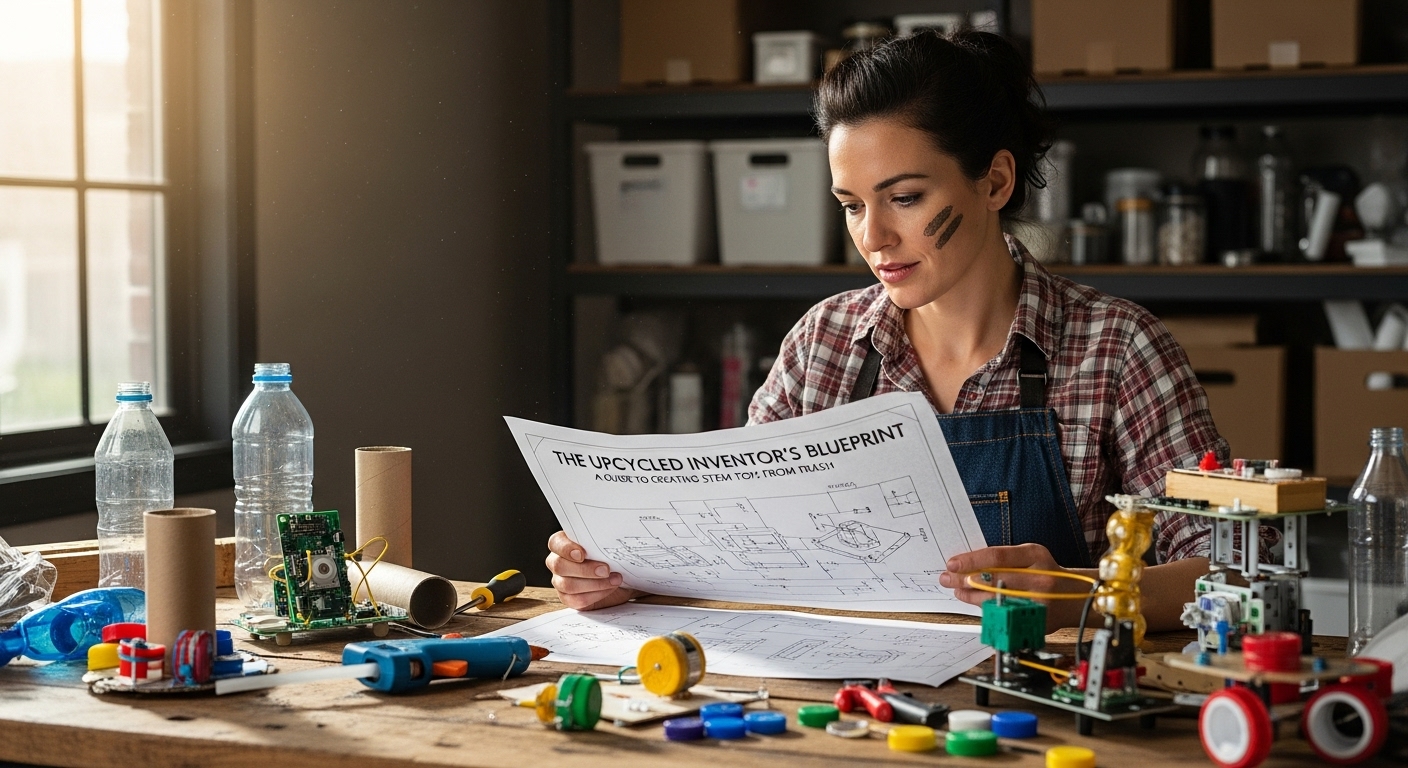
In a world overflowing with digital distractions and single-use products, a quiet revolution is happening in playrooms and kitchens around the globe. Parents and educators are looking at the recycling bin not as a container for waste, but as a treasure chest of possibilities. This is the heart of the upcycled inventor’s movement, a creative and sustainable approach to hands-on learning. The idea is simple yet powerful transforming household trash into engaging STEM toys. This practice does more than just save money or reduce landfill waste; it cultivates a new generation of thinkers, tinkerers, and problem-solvers. It empowers children to see potential where others see junk, fostering ingenuity and a deep, practical understanding of scientific principles. This guide will serve as your blueprint. We will explore the profound educational benefits of upcycling, help you assemble the perfect inventor’s toolkit from common recyclables, and walk you through projects that bring physics, engineering, and technology to life. Get ready to embark on a journey of creation and discovery.
Why turn trash into treasure for STEM learning
The choice to create STEM toys from discarded materials is a deeply impactful one, offering a wealth of benefits that extend far beyond the playroom. At its most fundamental level, it is an act of environmental stewardship. By repurposing plastic bottles, cardboard tubes, and egg cartons, you actively reduce the amount of waste heading to landfills. This provides a tangible lesson in sustainability, showing children that everyday objects have a life cycle and that we have the power to extend it creatively. The financial advantages are also undeniable. In an era of rising costs, purchasing new educational toys can be a significant expense. Upcycling provides an endless supply of free, versatile materials, making hands-on STEM education accessible to every family, regardless of budget. This democratization of learning is a powerful tool for leveling the playing field.
Beyond the practicalities, the educational rewards are immense. Building a toy from scratch engages a child’s problem-solving skills in a way that assembling a pre-packaged kit cannot. They must think about structure, stability, and function. They learn to experiment, to fail, and to iterate on their designs. This process builds resilience and a growth mindset. As one educator puts it,
The moment a child realizes they can build a working catapult from a toilet paper roll and a rubber band, they stop being just a consumer and become a creator.
This shift in perspective is the very essence of the ‘maker movement’. It fosters resourcefulness and creativity, encouraging kids to look at the world with an inventor’s eye. Abstract concepts like kinetic energy, gravity, and aerodynamics become concrete and understandable when children can manipulate them with their own hands, turning a pile of ‘trash’ into a profound and memorable learning experience.
Assembling your upcycled inventor toolkit
Becoming an upcycled inventor doesn’t require a fancy workshop or expensive supplies. Your journey begins by curating a collection of common household items that are typically destined for the recycling bin. Think of this as gathering your raw materials for innovation. A great way to start is by setting up a designated ‘inventor’s box’ or a set of bins where you can sort and store your treasures. For structural components, nothing beats cardboard. Start saving corrugated boxes of all sizes, cereal boxes, paper towel tubes, and toilet paper rolls. These items are perfect for building frameworks, ramps, and robot bodies. Plastic containers are also incredibly versatile. Clear plastic bottles, milk jugs, and yogurt cups can become rocket fuselages, boat hulls, or custom gears. Their durability and water resistance open up a whole new range of project possibilities.
Next, focus on connectors and moving parts. Bottle caps are fantastic as wheels, pulleys, or decorative elements. Rubber bands are essential for creating potential energy in catapults or powering simple vehicles. Straws, skewers, and craft sticks can act as axles, levers, or structural supports. Don’t forget smaller items like old CDs for their reflective surfaces and potential as spinning tops, or corks for their buoyancy. In addition to these recycled goods, you will need a few basic crafting tools. A good pair of scissors is a must, along with various types of adhesives like white glue, a hot glue gun (with adult supervision), and plenty of tape. A set of markers, crayons, or paint will allow your young inventor to add a personal, artistic touch to their final creations, blending the ‘A’ for Arts into STEM to create STEAM. Having these materials organized and accessible is key to encouraging spontaneous creativity. When inspiration strikes, your child will have everything they need to bring their unique vision to life.
Beginner projects exploring simple physics
Once your inventor’s toolkit is stocked, it’s time to dive into some foundational projects that make the principles of physics fun and tangible. A fantastic starting point is the Cardboard Tube Catapult. This simple machine is a thrilling way to explore concepts of energy and motion. To build one, you’ll need a paper towel tube, a plastic spoon, a few strong rubber bands, and a small base like a block of wood or a thick piece of cardboard. By affixing the tube to the base and attaching the spoon to the tube with rubber bands, you create a lever. Pulling the spoon back stores potential energy in the stretched rubber bands. When you let go, that potential energy is instantly converted into kinetic energy, launching a small projectile like a pom-pom or a marshmallow. This single project teaches lessons about levers, energy transfer, and trajectory. Children can experiment by changing the tension of the rubber bands or the angle of the launch to see how it affects the distance their projectile travels.
Another excellent beginner project is the Bottle Cap Spinning Top. This activity demonstrates principles of friction, gravity, and angular momentum using just a few simple items. You will need a plastic bottle cap, a short wooden skewer or a toothpick, and some modeling clay. Carefully, an adult should poke a hole in the center of the bottle cap. Push the skewer through the hole to create an axle and a handle. A small ball of modeling clay can be pressed into the underside of the cap to add weight and stability. When you spin the top, you are applying torque and giving it angular momentum, which helps it stay upright as it battles gravity and friction. Kids can create a whole collection of tops using different sized caps and varying the amount of clay. They can then hold ‘spin-offs’ to see which design spins the longest, leading to intuitive discoveries about balance, mass distribution, and stability. These projects prove that you don’t need a complex laboratory to witness fundamental laws of the universe in action.
Product Recommendation:
- JOYIN Mochi Squishy Toys Set, Random 25 Pack Mini Mochi, Party Favors for Kids, Kawaii Squishy, Stress Relief Toys, Basket Stuffers, Goodie Bags Fillers, Birthday Gifts, Classroom Prizes
- View Master Mickey Mouse Deluxe Set, Disney 100 Edition – STEM, Retro, Fun Learning Toy for Kids and Adults, Toddlers, Ages 3+
- Spidey and His Amazing Friends 3-Pack, 4-Inch Scale Marvel Action Figures, Includes 3 Figures and 3 Accessories, Spider-Man, Ghost-Spider & Miles Morales (Amazon Exclusive)
- Nex Playground – The Active Play System for Kids & Families Where Indoor Physical Activity Meets Interactive Family Fun and is Great for Gaming Nights, Parties and Playdates
- BooTaa 29 Large Dart Board for Kids, Kids Dart Board with Sticky Balls, Boys Toys, Indoor/Sport Outdoor Fun Party Play Game Toys, Birthday Gifts for 3 4 5 6 7 8 9 10 11 12 Year Old Boys Girls
Intermediate builds engineering challenges
As your young inventor’s confidence grows, you can introduce more complex projects that focus on engineering design and iteration. A classic intermediate build is the Plastic Bottle Water Rocket. This project is a spectacular demonstration of Newton’s third law of motion for every action, there is an equal and opposite reaction. You’ll need a standard two-liter soda bottle, some cardboard for fins, and a cork that fits snugly in the bottle’s opening. A bicycle pump with a needle adapter is also required for pressurization. After building and attaching fins to the bottle for stability, you fill it about one-third full with water. The cork, with the pump needle inserted through it, is then wedged into the opening. By pumping air into the bottle, you increase the pressure inside. When the pressure is high enough, the cork and water are violently forced out downwards (the action), causing the bottle to shoot upwards (the reaction). This project is a masterclass in aerodynamics and pressure systems. Kids can experiment with the amount of water, the shape of the fins, and the air pressure to optimize the rocket’s flight height and stability.
For a different kind of engineering challenge, an Egg Carton Marble Run is an exceptional project that emphasizes planning, gravity, and momentum. The primary material is a collection of cardboard egg cartons, along with paper towel tubes, and a large piece of cardboard to serve as a backboard. The goal is to cut up the egg cartons and tubes to create a series of ramps, tunnels, and drops that will guide a marble from a starting point at the top to a finishing point at the bottom. This requires careful thought about angles and slopes. If a ramp is too steep, the marble may fly off the track. If it’s too shallow, it might get stuck. This process of trial and error is at the heart of the engineering design process. Children will naturally experiment with different configurations, learning intuitively about gravitational potential energy being converted into kinetic energy. They can add funnels, jumps, and spirals, turning a simple physics experiment into an elaborate and engaging piece of kinetic art.
The ‘T’ and ‘M’ in STEM with recycled materials
While physics and engineering projects are often the most visible part of upcycled inventing, it’s just as easy to incorporate the technology and math components of STEM. The ‘technology’ aspect doesn’t have to mean electronics; at its core, technology is about using scientific knowledge for practical purposes, including the creation of tools and simple machines. A wonderful project is to build a simple Automaton or a moving sculpture from cardboard boxes. By using brass fasteners as pivot points, children can create figures with arms and legs that move when you pull a lever made from a craft stick. This introduces them to the concept of linkages, a fundamental part of mechanical engineering and robotics. For a more direct link to information technology, you can create a Binary Code Bracelet. Using two different colors of bottle caps or beads made from cut-up straws, children can learn to spell their name or secret messages using the binary alphabet, the ‘0s’ and ‘1s’ that form the basis of all digital computing. This simple craft demystifies a complex topic and makes the foundational language of computers accessible and fun.
Mathematics is inherently woven into almost every upcycling project. When building any structure, children are constantly engaging with geometry, spatial reasoning, and measurement. You can make this connection more explicit with targeted activities. A collection of bottle caps becomes a perfect tool for teaching counting, sorting by color or size, creating patterns, and basic arithmetic. For a geometry lesson, use straws and pipe cleaners (or string threaded through the straws) to build 2D shapes like squares and triangles. Then, challenge your child to combine those shapes to create 3D structures like cubes and pyramids. This hands-on approach helps them understand how complex shapes are built from simple components. When constructing a marble run or a cardboard fort, encourage them to use a ruler to measure pieces, fostering an appreciation for precision. These activities show that math is not just a subject in a textbook; it’s a practical tool for designing and building things in the real world.
Safety and finishing touches for your creations
As you and your young inventor dive into the world of upcycling, prioritizing safety is paramount. While you are working with household items, some can have hidden hazards. Before any material enters your inventor’s box, it should be thoroughly cleaned and dried. Food containers should be washed with soap and water to prevent mold or stickiness. It’s also crucial to inspect all materials for sharp edges. Plastic containers, when cut, can be surprisingly sharp, as can the edges of metal cans or lids. An adult should always handle the cutting of tough materials, and it’s a good practice to smooth any sharp plastic edges with sandpaper or cover them with a layer of tape. When using tools like a hot glue gun or a craft knife, direct adult supervision is not just recommended, it is essential. Establishing clear safety rules from the beginning ensures that the creative environment remains a positive and secure one, allowing for worry-free experimentation and fun.
The final phase of any project is where a creation truly comes to life, the finishing touches. This is where you can integrate the ‘A’ for Arts into your STEM work. Encourage your child to paint, draw on, and decorate their inventions. A cardboard robot becomes a character with a personality. A simple catapult can be decorated to look like a medieval siege engine. This step is not merely cosmetic; it fosters a sense of ownership and pride in the work. It also allows for another layer of creativity and self-expression. Furthermore, it’s important to emphasize the value of open-ended play. The goal isn’t always to create a perfect, finished toy. The true learning happens during the process. Encourage iteration. If a car doesn’t roll straight, ask your child ‘Why do you think that is?’ and ‘What could we change to make it work better?’. This mindset teaches that failure is not an endpoint but a valuable part of the design process, leading to deeper understanding and more robust creations. The ultimate toy is not the object itself, but the curiosity and confidence it builds.
In conclusion, the upcycled inventor’s blueprint offers a path to a more sustainable, creative, and intellectually stimulating form of play. By looking at your recycling bin as a source of raw material, you unlock a universe of educational potential that costs nothing. We have journeyed from the core reasons for embracing this mindset, touching on its environmental, financial, and cognitive benefits, to the practical steps of building your own inventor’s toolkit. We explored how simple items can vividly demonstrate complex principles of physics and engineering, from the launch of a catapult to the intricate design of a marble run. We also saw how technology and math are naturally integrated, turning every project into a holistic STEM learning experience. Safety and the freedom to creatively finish and iterate on designs are the final, crucial components that ensure this journey is both secure and deeply rewarding. Ultimately, turning trash into toys is about more than just building things. It is about building resourceful minds, resilient spirits, and a generation of innovators who understand that the most powerful tool they will ever have is their own ingenuity. So go ahead, open that recycling bin, and start inventing. The future is waiting to be built.