
In every home with children, a familiar graveyard exists. It is a box, a bin, or a forgotten corner filled with the casualties of playtime. This is the land of broken toys, a collection of mismatched limbs, wheelless cars, and headless figures. For many, this pile represents waste and sadness. But what if you could see it as a treasure trove of potential? Welcome to the world of ‘Franken-toying’, a creative and sustainable practice of combining broken toys into entirely new and unique creations. This is more than simple repair; it is an act of resurrection and imagination. This trend, also known as ‘toy hacking’ or ‘kitbashing’, is gaining popularity as a fantastic way to teach sustainability, encourage artistic expression, and develop problem-solving skills. In this guide, we will walk you through the entire process. We will explore how to gather your materials safely, deconstruct old toys for parts, design your new masterpiece, assemble it with care, and apply the finishing touches that bring your creation to life. Get ready to breathe new life into the forgotten and build something truly one-of-a-kind.
Embracing the spirit of the toy hacker
Becoming a toy hacker means adopting a new mindset. You are no longer just a consumer or a parent cleaning up a mess; you become a creator, a sculptor, and an engineer. This philosophy is rooted in the broader ‘maker culture’, which celebrates hands-on creation and modification over passive consumption. It’s about looking at a broken action figure not as garbage, but as a source for an arm, a leg, or a cool piece of armor for a future project. This approach has profound environmental benefits. By upcycling toys, you are actively diverting plastic from landfills, a small but meaningful step in combating waste. The toy industry is notorious for its plastic consumption, and giving these items a second or third life is a powerful lesson in resourcefulness for both adults and children. Beyond sustainability, the educational value is immense. The process engages what educators call STEAM skills. Science is involved in understanding materials and adhesives. Technology and engineering come into play when figuring out how to connect parts or create moving joints. Art is at the very core of the design and painting process. And mathematics can even play a role in measuring and scaling components. For a child, this is not a boring lesson; it is exhilarating play that builds confidence and critical thinking.
‘The moment you see a new creature emerge from two broken toys is pure magic. It teaches kids that things don’t have to be thrown away; they can be transformed’.
This sentiment captures the essence of toy hacking. It is an empowering activity that transforms junk into joy and problems into projects. It encourages looking at the world with an eye for possibility and reinvention.
Gathering your laboratory supplies
Before you can begin your magnificent experiments, you must assemble your toolkit. A well-stocked ‘laboratory’ will make the creation process smoother, safer, and more fun. Your supplies can be broken down into essential items and more advanced gear for ambitious projects. For the absolute basics, you will need a few key things. First is a strong adhesive. A high-quality super glue is excellent for bonding hard plastics, while a hot glue gun offers a faster, albeit less permanent, bond for tacking pieces in place. You will also need cutting tools. A sturdy pair of craft knives or a box cutter is essential for separating parts, but always exercise extreme caution. Safety goggles are non-negotiable to protect your eyes from flying plastic shards. A cutting mat is also highly recommended to protect your work surface. Finally, have a collection of ‘donor’ toys ready; this is your raw material. For more advanced creators, the toolkit can expand significantly. A rotary tool, like a Dremel, is a game-changer. It allows for precise cutting, sanding, grinding, and drilling, opening up a world of modification possibilities. Two-part epoxy putty, such as Milliput or ‘Green Stuff’, is another invaluable material. This clay-like substance can be used to sculpt new details, fill gaps between mismatched parts, and create incredibly strong structural bonds as it cures. When it comes to painting, while simple acrylics work, a can of spray primer will help your paint adhere much better to various plastic surfaces, giving you a more professional and durable finish. Always prioritize safety. Work in a well-ventilated area, especially when using glues, sprays, or a rotary tool. If children are involved, ensure strict adult supervision, particularly around sharp tools and hot glue guns. Choosing non-toxic glues and paints is also a critical consideration if the final creation is meant to be played with.
The art of careful deconstruction
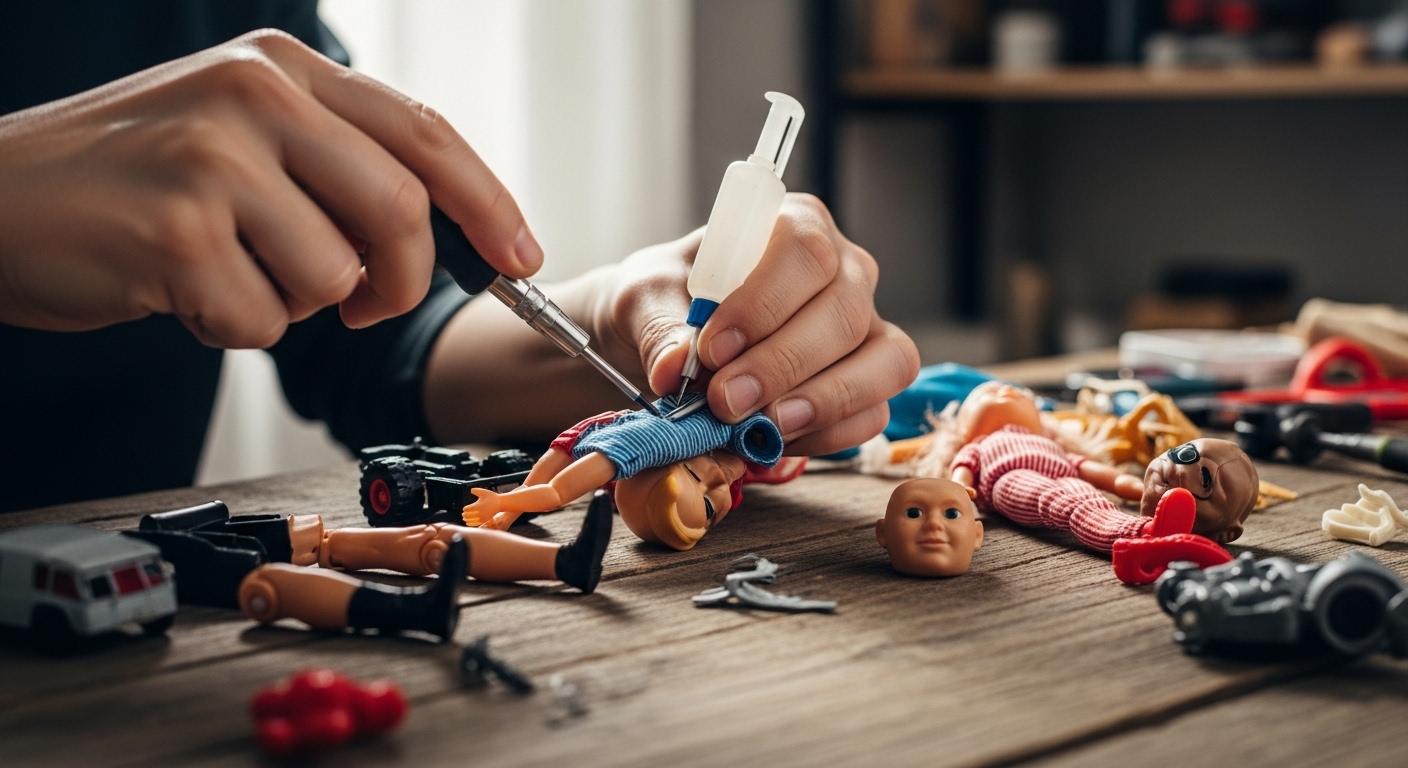
The process of creating a Franken-toy begins with its opposite which is deconstruction. This stage is a delicate art form, requiring patience and a strategic eye. Your goal is not to smash toys to bits, but to carefully harvest the most useful and interesting components for your parts library. Think of yourself as a surgeon, not a demolitions expert. Start by examining your donor toys. Look for key features you might want to reuse. These could be limbs with interesting joints, heads with unique expressions, vehicle chassis, wings, weapons, or any decorative greeblies which are small detailing parts that add visual complexity. The way a toy is assembled will dictate your approach. Many toys are held together by small screws, often hidden under stickers or in deep recesses. A set of small precision screwdrivers is your best friend here. Unscrewing the toy is the ideal method as it preserves the parts in their entirety. Other toys are snapped or glued together. For these, you may need to carefully pry them apart using a flathead screwdriver or a craft knife. Apply gentle, steady pressure along the seams to pop them open. Sometimes, you have no choice but to cut. When you must cut, plan your incision carefully. A cut along a natural seam or joint line is often easier to hide or integrate into your new design. For example, removing an arm at the shoulder socket is much cleaner than cutting it mid-bicep. Once you have a collection of disembodied parts, the next step is organization. Create a simple sorting system. Bins or sectioned boxes are perfect for this. You might sort parts by type like heads, arms, legs, wheels, and accessories. This ‘boneyard’ of components will become your creative palette, allowing you to quickly find the perfect piece when inspiration strikes. This organized library of parts is what separates a casual tinkerer from a dedicated toy hacker. It transforms a pile of junk into a system of possibilities.
Product Recommendation:
- Kids Telescope, 50mm Aperture 360mm Refractor Telescope with Tabletop Tripod and Two Eyepieces, Perfect for Astronomy Beginners, for Kid 6 to 18 Years Old, Exclusive Kids Toy Gift
- 120 Pcs Fidget Toys Pack, Pop Sensory Party Favors Set Gifts for Kids Adults Boy Girl Stocking Stuffers Autistic Bulk Goodie Bag Filler Treasure Box Classroom Prizes School
- Voice Changer for Kids – Gifts for Kids – Voice Changing Device for Boys & Girls Ages 3-8+ Olds – Birthday Gifts for 3, 4, 5, 7, 8 Year Old Boy – Cool Outdoor Toys Gift Ideas for Kid, Toddler
- Kikidex Magnetic Drawing Board, Toddler Girl Toys for 1-2 Year Old, Doodle Board Pad Learning and Educational Toys for 1 2 3 Year Old Baby Kids Birthday Gift(Soft Pink)
- Phyulls Smart Watch for Kids with 24 Games Alarm Clock, Touchscreen, Calendaring Camera Music Player Time Display Video & Audio Recording, Toys for 3-12 Years Old Boys
Designing your magnificent monster
With your parts library organized, the most exciting phase begins which is the design. This is where your imagination takes over. There are no rules here, only possibilities. The goal is to look at your collection of disparate parts and envision new combinations. A great way to start is by simply ‘dry-fitting’ pieces together. Pick up a torso and try different heads on it. See how a pair of dragon wings might look on a construction vehicle. This tactile process of mixing and matching often sparks unexpected ideas. Does a dinosaur head on a tank body look menacing or hilarious? Either way, it is a starting point for a unique creation. Don’t be afraid to think thematically. Are you building a post-apocalyptic survival vehicle, a mythical beast, or a futuristic robot? Having a theme can help guide your part choices. For a sci-fi robot, you might look for sleek, geometric parts, while a monster might be built from more organic and textured components. Sketching can be an incredibly helpful tool during this stage. You don’t need to be a great artist. A simple stick-figure sketch can help you visualize the overall silhouette and proportions of your creation before you commit to gluing anything. This allows you to solve potential structural problems on paper. For instance, you might realize that the legs you chose are too small to support the heavy torso you planned to use. A key principle in the world of kitbashing is creating a cohesive look. Try to find parts that share a similar design language or scale, even if they come from completely different toy lines. If you can’t find perfect matches, don’t worry. This is where your skills with epoxy putty and paint will come in later, to blend the different elements into a unified whole. The design phase is all about play and experimentation. Let your creativity run wild and enjoy the process of discovery. The most memorable Franken-toys are often born from the most unexpected combinations.
The assembly process putting it all together
Once you have a solid design plan, it is time to make it permanent. The assembly phase is where your creation truly takes physical form. This stage requires precision and an understanding of your materials, particularly your adhesives. Start by ensuring your parts are clean and free of dust or grease, which can prevent a strong bond. If you are joining two large, flat surfaces, super glue or a plastic cement will often do the trick. Apply the glue sparingly and press the parts together firmly, holding them until the bond sets. For smaller or more delicate pieces, using a gel-type super glue can give you more control and prevent the glue from running. The real challenge comes when you need to join parts that don’t fit together perfectly. This is where you will need to create stronger, more structural connections. One technique is ‘pinning’. This involves drilling a small hole in both parts you want to join and inserting a small piece of metal wire, like a cut paperclip, before gluing. This pin acts as an internal skeleton, creating a much more durable joint that is less likely to snap. When you have significant gaps between parts, epoxy putty is the solution. Mix the two parts of the putty according to the instructions, and then press it into the gaps. You can use sculpting tools or even a wet fingertip to smooth the putty and blend it seamlessly with the plastic surfaces. This not only strengthens the connection but also makes the transition between the different toy parts look more natural and intentional. Hot glue can be useful for quickly tacking pieces in place to check the pose and balance of your creation before committing with a more permanent adhesive. However, be aware that hot glue bonds are not as strong and can be bulky. Take your time during assembly. Work on one joint at a time and allow the adhesive to fully cure before putting stress on it. This patient approach will result in a sturdy, well-built Franken-toy that can withstand admiration and even gentle play.
Painting and finishing for a professional look
The final step in the Franken-toy formula is the paint job. This is arguably the most transformative stage, where you unify all the disparate plastic parts into a single, cohesive creation. A great paint job can make a model look like it was manufactured that way from the start, rather than being cobbled together. The first and most crucial step is priming. Plastics are notoriously difficult for paint to stick to. A layer of spray primer creates a uniform, matte surface that acrylic paints will happily adhere to. Choose a primer color based on your intended color scheme. A black primer is great for creating deep shadows and a gritty look, while a white or grey primer is better for bright, vibrant colors. Always use spray primers in a well-ventilated area and apply it in thin, even coats to avoid obscuring details. Once the primer is dry, you can begin applying your base colors. This is the main color of each area of your model. Water-downed acrylic paints, often sold as model or craft paints, are perfect for this. Apply several thin coats rather than one thick one. This prevents brush strokes from showing and preserves the fine details of your model. After the base coats are dry, you can bring your creation to life with details and weathering. Use a small brush to pick out small elements like buttons, eyes, or wires. A technique called a ‘wash’, which is very thin, dark paint, can be applied over the model to seep into the recesses and create realistic shadows. Another technique, ‘dry-brushing’, involves using a brush with very little paint on it to lightly dust over the raised edges, highlighting them and creating a sense of texture and wear. Finally, consider adding weathering effects to tell a story. A few flecks of metallic silver can look like chipped paint. A light dusting of brown or tan paint can simulate mud or dust. These small touches make your Franken-toy feel more realistic and lived-in. Once you are happy with your paint job, seal your work with a coat of matte or gloss varnish. This will protect the paint from chipping and give your creation a finished, professional look.
Conclusion
The journey from a bin of broken plastic to a fully realized, custom creation is a deeply rewarding one. The Franken-toy formula is more than just a craft project; it is a celebration of creativity, a practical lesson in sustainability, and a powerful way to develop new skills. By following these steps, you have learned to see potential where others see trash. You have practiced the careful arts of deconstruction and assembly, the imaginative process of design, and the transformative power of a good paint job. You have become a toy hacker, a maker, and an artist. The skills you have honed are applicable far beyond the workbench. This process teaches patience, problem-solving, and the value of looking at challenges from different angles. It is a reminder that with a little ingenuity, something broken can be made whole again, and not just whole, but entirely new and wonderful. The best part is that your journey is just beginning. Your parts library will grow with every toy that suffers the misfortunes of playtime. Your techniques will improve with every creation you complete. We encourage you to share your work. Join online communities of toy hackers and kitbashers, use hashtags like #Frankentoy and #ToyHacking, and inspire others with your magnificent monsters and marvelous machines. So go ahead, look at that pile of broken toys with fresh eyes. See the treasure within the trash. Your next masterpiece is waiting to be born.