
Is there anything more frustrating for a music producer than a track that sounds sterile, robotic, and lifeless? In a world saturated with digital music, the ability to infuse your creations with a genuine, human touch is no longer a luxury—it’s the very thing that separates a good track from a great one. This is the essence of the ‘humanizer hack’, a collection of techniques designed to bridge the gap between the pristine perfection of the digital audio workstation and the beautiful, subtle imperfections of a live musician. The cold, mechanical nature of MIDI sequencing can often strip the soul from a performance. But it doesn’t have to be that way. By understanding and applying core principles of humanization, you can transform your virtual instruments from rigid metronomes into expressive, breathing entities. In this guide, we will explore the essential methods for making your digital instruments sound truly authentic. We’ll delve into the nuances of velocity and timing, the transformative power of automation, the art of layering textures, and how to select the right tools to bring your musical ideas to life with unparalleled realism.
The core principles of digital humanization
At its heart, digital humanization in music production is the art of intentional imperfection. It’s about recognizing that the ‘human’ element in music doesn’t come from flawless execution but from minute, often subconscious, variations in performance. When a musician plays an instrument, no two notes are ever identical. There are tiny shifts in timing, subtle differences in pressure or attack, and slight fluctuations in pitch. Our brains are incredibly adept at picking up on these micro-variations, and they are what make a performance feel organic and emotionally resonant. The first major principle is embracing dynamic variation. This goes beyond simple volume changes; it’s about how the loudness of a note affects its character or timbre. The second principle is rhythmic feel. A real drummer doesn’t hit every beat with machine-like precision. They might play slightly ahead of the beat to create urgency or lag slightly behind it to create a relaxed, ‘laid-back’ groove. This push and pull against the rigid grid of your software is fundamental to creating a compelling rhythm. Therefore, the goal of humanization is not to add random chaos to your music. Instead, it is a deliberate process of mimicking these natural inconsistencies. It involves moving away from the default settings and the ‘snap-to-grid’ mentality, and instead, making conscious choices to introduce variability that serves the song’s emotional arc. It’s about thinking less like a programmer and more like the performer you are trying to emulate.
Mastering velocity and dynamics for expression
Velocity is arguably the most powerful yet underutilized tool for breathing life into a MIDI performance. In the digital realm, MIDI velocity is a value from 0 to 127 that represents how hard a note was played. While its most basic function is to control volume, its true expressive potential is unlocked when using high-quality virtual instruments. In a well-crafted sample library, different velocity levels don’t just trigger a quieter or louder version of the same sound; they trigger entirely different samples. A softly played piano key sounds mellow and warm because the hammer gently strikes the string. A hard-played key sounds bright and percussive because the hammer strikes with force, creating a wealth of overtones. To master this, you must move beyond simply randomizing velocities. Instead, think in phrases and musical gestures. For example, when programming a piano melody, you might gradually increase the velocity of notes in an ascending phrase to build tension, creating a natural crescendo. For a drum pattern, avoid making every snare hit have the same velocity. The main backbeats on 2 and 4 should typically be the strongest, while ghost notes or grace notes should have significantly lower velocities to create a sense of groove and complexity. You can also apply this to string sections; a slow, emotional passage will have less velocity variation than a fast, aggressive spiccato section. The key is to edit your MIDI with intent. Listen to how a real instrumentalist would play the part and try to replicate those dynamic contours. Spend time in your DAW’s MIDI editor, manually adjusting velocities to create builds, falls, and accents that support the musical narrative.
Breaking the grid timing and groove
The metronomic precision of a digital audio workstation is both a blessing and a curse. While it ensures everything is perfectly in sync, it can also lead to stiff, mechanical-sounding rhythms. Human musicians naturally waver in their timing, and it’s this subtle ebb and flow that creates what we call ‘groove’. To break free from the rigid grid, you must strategically manipulate the timing of your MIDI notes. The first step is to explore your DAW’s quantization features beyond the default 100% setting. Most software allows you to apply quantization by a certain percentage, which moves notes closer to the grid without making them perfectly aligned. This retains some of the original timing’s natural feel while tightening up the performance. Another powerful tool is the ‘swing’ or ‘groove’ template. These templates apply a specific rhythmic feel, often derived from classic drum machines or legendary live drummers, to your MIDI parts. Applying a subtle swing can instantly make a straight-eighths hi-hat pattern feel more fluid and danceable. For even more control, consider manually nudging individual notes off the grid. A common technique is to slightly delay the snare drum hits in a beat to create a more relaxed, ‘in the pocket’ feel. Conversely, pushing a kick drum or a bass note slightly ahead of the beat can add a sense of urgency and drive. The amount of push or pull is tiny, often just a few milliseconds, but the psychological impact on the listener is significant. Don’t be afraid to turn the grid off entirely for certain parts, like a solo or a melodic fill, and ‘perform’ them in real-time with a MIDI keyboard. Even if you have to clean it up later, the initial take will contain a natural rhythmic character that is difficult to program manually.
Product Recommendation:
- Lyre Harp Mahogany with Tuning Wrench and 16 Pcs Metal Spare String Set Manual Picks Black Gig Bag for Instrument Kids Adult Professional Beginner Music Lovers Gift
- MOSEN Upgraded Electronic Drum Set with 3 Mesh Pads, 3 Cymbals, Mobile Stand & Headphones, 195+ Sounds, 32 Polyphony, Newly Update Module, Velocity Sensitive for Adults/Kids, Home Studio Practice Kit
- 1 Set 17 Key Kalimba for Beginners Easy to Play Thumb Piano Cute Cat Head Design Lightweight Portable Acrylic Instrument for Adults for Music Lovers
- Vaguelly 1Pc Double Side Tambourine Percussion Musical Instrument Radiant Hand Drum for Adults Durable Design Great Present for Music Lovers
- Kisangel 1 Set Thumb Adult Key Portable Finger 𝑲𝒂𝒍𝒊𝒎𝒃𝒂 Lap Small Music Instrument Hand Musical Instrument Pink Metal
Automation as your secret weapon
If velocity and timing are the foundation of a humanized performance, then automation is the intricate detail work that makes it truly convincing. A static sound, even one with good velocity and timing, can still feel digital. Real instruments are constantly in flux; a guitarist’s finger pressure changes, a saxophonist’s breath control wavers, and a synth’s filter might drift over time. Automation allows you to recreate this constant, subtle motion. The most obvious candidate for automation is volume. Creating slow, almost imperceptible volume swells over the course of a long-held chord can mimic the natural dynamics of a string section or a vocalist sustaining a note. But the real magic happens when you automate other parameters. Try automating the filter cutoff on a synth pad, so it slowly opens and closes, adding a gentle, evolving quality to the sound. Automate the panning of a percussion element so it subtly shifts in the stereo field, creating a sense of space and movement. You can even automate the parameters of your effects. For instance, increasing the send to a reverb on the last word of a vocal phrase can create a dramatic, lingering effect. One of the most effective techniques is to automate pitch, but only in very small amounts. A tiny, slow-moving LFO mapped to the fine-tune parameter of an instrument can simulate the slight pitch drift inherent in analog synthesizers or string instruments. To make automation feel truly organic, consider ‘performing’ it rather than drawing it with a mouse. Use a MIDI controller with faders and knobs to record your automation moves in real-time. This will capture the natural imperfections of your own physical movements, translating them directly into the sound and adding a layer of authenticity that is nearly impossible to program by hand.
The power of layering and texture
No real-world sound exists in a perfect vacuum. A recording of a live instrument isn’t just the sound of the instrument itself; it’s also the sound of the room it’s in, the subtle mechanical noises of the instrument, and even the player’s presence. You can simulate this richness by layering your primary digital instruments with secondary sounds and textures. This technique adds a layer of complexity and realism that can trick the listener’s ear into perceiving the sound as more organic. A classic example is adding the sound of a piano’s mechanical noises—the soft thud of the pedal being pressed or the click of the keys—as a separate, low-volume audio track beneath your MIDI piano part. For a virtual flute, you could layer in a quiet recording of a musician’s breath. These subtle cues add a powerful sense of verisimilitude. Another approach is to layer different virtual instruments playing the same part. For instance, instead of using a single string patch for a string section, try layering a bright, detailed patch with a warmer, more ambient one. Pan them slightly apart and adjust their volumes to taste. This creates a composite sound that is richer and more complex than any single patch, making it harder to identify as a ‘stock’ sound. Don’t be afraid to get creative with your textural layers. Adding a field recording of gentle rain or the subtle crackle of vinyl under a clean digital loop can provide an organic bed for your track to sit in. The key is subtlety. These textural layers should be felt more than heard, existing at the edge of perception to add depth and character without distracting from the main musical elements.
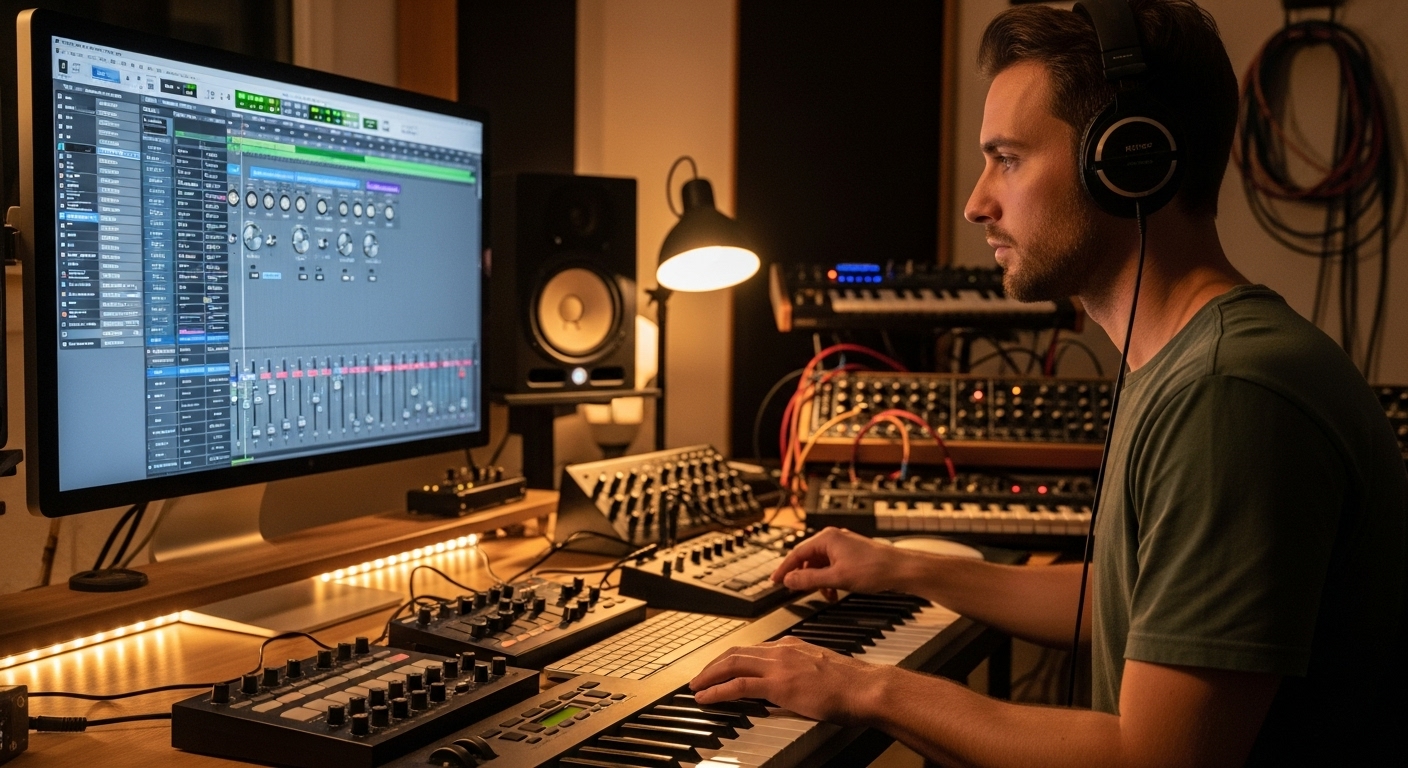
Choosing the right tools and samples
While the techniques of humanization are universal, the quality of your source material plays a monumental role in the final result. You can apply every trick in the book, but if you’re starting with a low-quality, single-sample instrument, it will always sound flat. Investing in high-quality sample libraries and virtual instruments is crucial for achieving authentic results. When choosing an instrument, look for key features that facilitate realism. The most important is ’round-robin’ sampling. This means that instead of using one sample for a given note, the instrument has multiple different recordings of that same note. Each time you trigger the note, the software cycles through these different samples, avoiding the dreaded ‘machine gun’ effect where repeated notes sound unnervingly identical. Another critical feature is the number of velocity layers. A deeply sampled instrument might have a dozen or more velocity layers, ensuring a smooth and natural transition from soft to loud playing. Many modern DAWs also come equipped with powerful built-in humanization tools. Ableton Live’s Groove Pool and Logic Pro’s Humanize functions offer sophisticated ways to apply non-destructive timing and velocity variations. Explore these features within your software of choice. Furthermore, the world of music technology is constantly evolving. Emerging AI-powered plugins can analyze human performances and apply their nuanced characteristics to your MIDI data. While not a replacement for musical understanding, these tools can be powerful assistants. Ultimately, the best tool is your own critical ear. Spend time listening to recordings of the real instruments you are trying to emulate. Pay close attention to their dynamics, phrasing, and articulation. The more you understand the nuances of a real performance, the better you’ll be at recreating it in the digital world, regardless of the specific tools you use.
In conclusion, the ‘humanizer hack’ is not a single button or plugin but a mindset—a commitment to moving beyond digital perfection in pursuit of musical expression. We’ve journeyed through the core pillars of this approach, from mastering the subtle arts of velocity and timing to leveraging automation and layering as tools for adding depth and life. By breaking free from the rigid grid, you allow your music to breathe, to push and pull with a natural rhythmic feel that connects with listeners on a primal level. By carefully sculpting dynamics and automating parameters, you can mimic the constant, subtle flux of a live performance, making your instruments feel responsive and alive. Remember that the goal is intentional imperfection, not random chaos. Every choice to shift a note or vary a velocity should serve the song’s emotional core. The most profound takeaway is that technology is merely a conduit. To truly make digital instruments sound authentic, you must first listen to and understand the nuances of human musicians. Study their phrasing, their dynamics, their feel. Then, use the powerful tools at your disposal to translate that understanding into your own creations. Start experimenting, be patient, and watch as your digital compositions transform into vibrant, breathing works of art.