
Have you ever scrolled through social media and marveled at the seamless, sculpted yet incredibly natural makeup of celebrities like Hailey Bieber or Kendall Jenner? The secret isn’t a magic filter or a prohibitively expensive foundation; it’s a technique that turns conventional makeup application on its head. Welcome to the world of underpainting, also known as the reverse contour method. This approach, recently popularized by celebrity makeup artist Mary Phillips, has gone viral for its ability to create a ‘lit-from-within’ glow that looks less like makeup and more like perfect skin. Instead of layering contour and concealer on top of foundation, you apply them first, creating dimension from underneath. The result is a soft-focus, beautifully blended finish that avoids any hint of cakey-ness. In this guide, we will explore exactly what the reverse contour method entails, how to choose the right products, and provide a detailed step-by-step tutorial to help you master this game-changing technique for a flawless, second-skin finish every single time.
What is the reverse contour method or underpainting?
The reverse contour method, more trendily known as underpainting, is a makeup technique that inverts the traditional order of base product application. Typically, one would start with foundation and then add contour, concealer, and blush on top to build dimension. Underpainting flips this script entirely. The process begins on clean, prepped skin where you first apply your contour and highlighting products—like concealer—directly onto the face to map out the high and low points of your bone structure. This means placing darker contour shades in the areas you want to recede, such as the hollows of your cheeks and along the jawline, and lighter concealer shades in areas you want to bring forward, like under the eyes and the center of the forehead. Once these products are strategically placed and blended, a thin, sheer layer of foundation is applied over the top. This final layer doesn’t obscure the work underneath; instead, it unifies all the elements, allowing the pre-applied contour and brightness to peek through subtly. The philosophy is simple yet revolutionary; you are building the ‘scaffolding’ of your face first and then draping a veil of skin-like coverage over it. This technique isn’t entirely new, but its resurgence, thanks to platforms like TikTok and artists like Mary Phillips, has highlighted its effectiveness for achieving a modern, fresh, and unbelievably natural look that appears sculpted from within rather than painted on top.
The science behind a flawless base
The genius of the underpainting technique lies in its understanding of light, shadow, and layering. By applying contour and concealer before foundation, you are essentially creating a three-dimensional map on your skin that mimics natural facial structure more authentically than products layered on top. When you apply a dark contour cream, you’re creating an artificial shadow. When you apply a light concealer, you’re creating an artificial highlight. In the traditional method, these elements sit on top of the foundation, and it takes significant effort to blend them into the base without them looking like distinct stripes of color. With underpainting, these elements are applied first and blended into the skin itself. The subsequent layer of foundation acts as a harmonizing filter. It gently diffuses the edges of the contour and concealer, melting them together for an exceptionally smooth transition. This prevents the harsh lines that can often result from post-foundation sculpting. Furthermore, this method allows you to use significantly less foundation. Since the heavy lifting of sculpting and concealing is already done, you only need a sheer wash of foundation to even out skin tone. This is the key to avoiding the heavy, ‘cakey’ look that many people struggle with. The foundation’s job shifts from providing full coverage to simply unifying the complexion, which allows your natural skin texture to remain visible. It’s a technique that prioritizes enhancement over concealment, creating a base that moves and breathes with your skin for a truly believable and long-lasting finish.
Choosing your perfect underpainting products
The success of the reverse contour method hinges almost entirely on using the right product formulations. For this technique, cream and liquid products are your best friends. Powder products are not suitable for the initial sculpting stage because they are designed to be layered over a liquid or cream base, not under one. Applying liquid foundation over powder contour would result in a patchy, muddy mess. Therefore, you must invest in cream or liquid contour, bronzer, concealer, and even blush. When selecting a contour product, look for a shade with a cool or neutral undertone, as this will more accurately mimic the look of a natural shadow on your face. A cream contour stick or a pot of cream makeup is ideal. For concealer, choose a creamy, blendable formula that is one to two shades lighter than your skin tone to create brightness without looking stark or ashy. This will be used to lift the high points of your face. The foundation you choose is equally critical. You should opt for a sheer to medium coverage foundation with a natural or luminous finish. A heavy, full-coverage matte foundation will completely cover all the beautiful sculpting you did underneath, defeating the entire purpose of the technique. The goal is for the contour and highlight to subtly show through the foundation, so a lightweight formula is non-negotiable. Finally, have the right tools on hand. A damp makeup sponge is excellent for both blending the cream products and stippling on the foundation, while dense brushes can also work well for a seamless blend.
Product Recommendation:
- ForeverYoung DIY Growth Chart for Wall Diamond Art Kits for Kids Diamond Painting Kits for Adults, Square Drill Diamond Painting Kit, Gem Art Kit Diamond Dots, Make Up Height Chart 47.2 x 3.9 Inch
- All in One Makeup Gift Set for Women Full Kit for2x14-color eyeshadow palettes,5xlipgloss sets,mascara,eyeliner,eyebrowpowder,eyebrow pencil, foundation, highlighter stick etc
- 12 Pcs Glow In The Light Body Face Paint, Face Painting Kit, Glow In The Dark Under UV Black Light Sticks Makeup Neon Face Painting Kits for Adult Halloween Festival Accessory
- VESPRO Face Painting Kit For Kids Party,32 Colors Professional Oil Face&Body Paint Kit with 10 Brushes 4 Reusable Face Stencils,2 Glitters and 2 Sponges for Kids and Adults Halloween Makeup
- Pro Face & Body Paint Cake Pots Grass Green – Professional Water Based Face Paint Makeup for Adults, Kids – 1.26oz
A step-by-step guide to the reverse contour technique
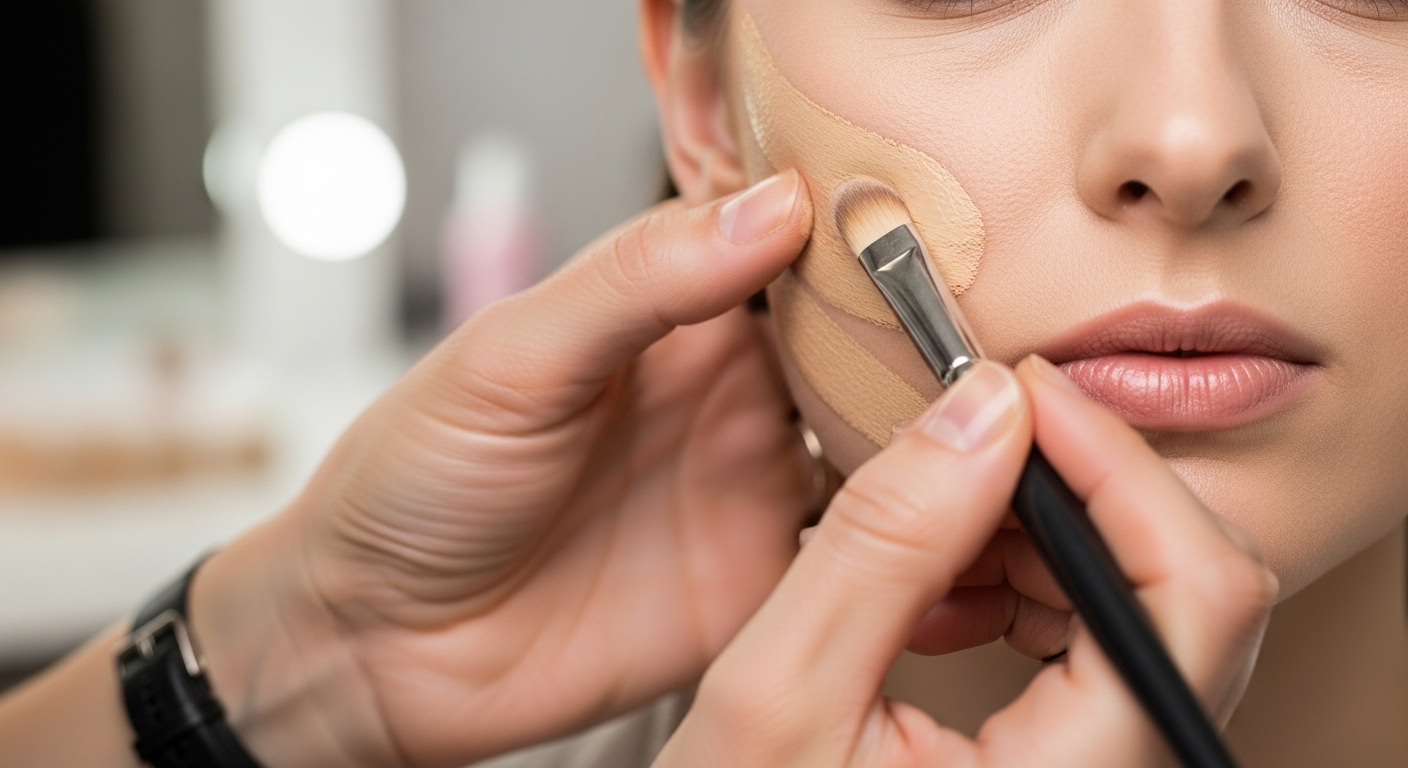
Ready to try it for yourself? Mastering the underpainting method is all about placement and blending. Follow these steps for a flawless application. First, begin with your skincare. A clean, hydrated, and well-moisturized face is the perfect canvas. Apply a primer if you normally use one. Second, apply your cream contour. Using a stick, wand, or brush, place the contour in the areas you wish to define. This typically includes the hollows of your cheeks (from your ear towards the corner of your mouth), along your jawline, on the sides of your nose, and along your hairline. Don’t be afraid of the initial stripes; we’ll blend them soon. Third, apply your brightening concealer. Place the lighter concealer shade under your eyes in an upward lift toward the temples, in the center of your forehead, down the bridge of your nose, and on your chin. These are the high points where light would naturally hit. Fourth, and this is a crucial step, blend everything out. Using a damp makeup sponge or a dense brush, gently tap and press to blend the edges of the contour and concealer into your skin. You want soft gradients, not harsh lines. The products should melt into your skin. Fifth, apply your foundation. Dispense a small amount of your sheer foundation onto the back of your hand. Using your damp sponge, lightly stipple and press the foundation over your entire face, including over the areas you just contoured and concealed. Do not swipe or drag the sponge, as this will displace the products underneath. The goal is to create a thin, unifying veil. Lastly, set your makeup. If you have oily skin or want extra longevity, lightly dust a translucent setting powder over your T-zone and under your eyes to lock everything in place.
Common mistakes to avoid for a perfect finish
While the reverse contour method is transformative, a few common slip-ups can derail your results. The most frequent error is using too much product. Because you’re applying contour and concealer first, it can be tempting to be heavy-handed, but remember that a sheer layer of foundation won’t hide major mistakes. Start with a small amount of your contour and concealer; you can always add more, but it’s difficult to take away. The second major pitfall is insufficient blending before the foundation step. If you leave harsh, unblended lines of contour or concealer, they will still be visible through your foundation, just slightly muted. Take an extra minute to ensure all edges are soft and diffused. Your face should look sculpted but smooth before you even reach for your foundation. Another mistake is choosing the wrong foundation. As mentioned earlier, a full-coverage, matte foundation is the enemy of this technique. It will erase all your hard work, creating a flat, one-dimensional look. Stick to light-to-medium coverage formulas with a natural or dewy finish. The application of the foundation is also key. Many people instinctively swipe or rub foundation on, but for underpainting, this will just smear the products underneath into a muddy mess. You must use a gentle pressing or stippling motion with a damp sponge or brush to deposit the foundation without disturbing the layers below. Finally, using powder products for the initial sculpting phase is a guaranteed way to get a patchy result. Stick to creams and liquids that can seamlessly meld with the liquid foundation you apply on top.
Adapting underpainting for different skin types and occasions
The beauty of the underpainting technique is its versatility. It can be easily customized to suit various skin types, concerns, and occasions. If you have oily skin, the idea of layering cream products might seem daunting, but it can actually improve makeup longevity. The key is to use long-wearing or matte-finish cream products for your contour and concealer. After applying your foundation, be more strategic with your setting powder. Use a powder puff to press powder firmly into the T-zone and other areas where you tend to get shiny. This will lock in the layers and control oil throughout the day. For those with dry skin, underpainting is a dream come true as it helps avoid the cakey finish that can emphasize dry patches. Prioritize hydration during your skin prep. Use luminous, hydrating formulas for your concealer and contour. You might even want to mix a drop of facial oil into your foundation for an extra dewy glow. Be minimal with powder, applying it only where absolutely necessary. The technique can also be adjusted for different events. For an everyday, ‘no-makeup makeup’ look, use a light hand and very soft, natural shades for your contour. The goal is a subtle enhancement. For a glamorous evening event, you can build up the intensity. Apply a bit more contour and a brighter concealer to create more dramatic dimension. You can even layer a powder contour and highlighter very lightly on top of your finished base to amplify the effect for photos and low-light settings. This adaptability makes underpainting not just a trend, but a foundational skill for any makeup lover.
In conclusion, the reverse contour method is far more than a fleeting social media trend; it’s a fundamental shift in how we can approach base makeup. By prioritizing structure and dimension from the outset, underpainting allows for a finish that is both flawlessly sculpted and astonishingly natural. It empowers you to use less foundation, letting your real skin shine through while still achieving a polished, unified complexion. This technique moves away from the old ideal of masking imperfections and toward a modern philosophy of enhancing your unique features. The result is a ‘lit-from-within’ radiance that looks seamless both in photos and in person. While it may require a slight adjustment in your routine and a focus on cream products, the payoff is immense. It delivers a long-lasting, non-cakey base that is adaptable for any skin type or occasion. We encourage you to embrace this inverted process. Experiment with product placement, master the stippling motion, and discover the transformative power of building your base from the inside out. Give this game-changing technique a try and unlock your most flawless, natural-looking base yet.