
In a world of digital screens and battery-operated gadgets, the simple joy of hands-on play is making a powerful comeback. Parents everywhere are rediscovering the profound impact of sensory activities on a child’s development. A sensory station is not just a play area; it’s a dynamic learning environment that you can create with everyday items found right in your home. This guide is your toolkit for unlocking a universe of creativity, learning, and connection. Forget expensive store-bought toys; the most impactful developmental tools are often the ones you craft yourself, filled with intention and love. By engaging their senses, children build crucial neural pathways, enhance motor skills, and learn to understand the world around them in a deeply personal way. This article will walk you through the entire process. We will explore the fundamental importance of sensory play, help you gather a versatile toolkit of materials, and provide step-by-step inspiration for toys that engage touch, sight, and sound. We will also cover how to set up the perfect station and, most importantly, how to ensure every creation is completely safe for your little one. Let’s begin this rewarding journey of crafting developmental magic.
Understanding the power of sensory play
Sensory play is any activity that stimulates a young child’s senses touch, smell, taste, movement, balance, sight, and hearing. This form of play is not just for fun; it is a critical component of brain development. When a child squishes playdough, listens to the sound of a homemade shaker, or sorts colorful objects, their brain is forming new, stronger connections. These neural pathways are the foundation for more complex learning tasks in the future. Experts in child development often emphasize that a rich sensory environment helps children refine their thresholds for different sensory information, which can assist them in self-regulation and navigating various environments. For example, a child who regularly engages with different textures may be less likely to be distressed by the feeling of a new type of clothing or a sandy beach. This process supports the development of both fine and gross motor skills. Scooping rice into a cup hones hand-eye coordination, while stomping on bubble wrap engages larger muscle groups and provides proprioceptive input, which is the sense of one’s own body in space. Furthermore, sensory play is a wonderful catalyst for language development. As children explore new materials, they learn new descriptive words like ‘slimy’, ‘grainy’, ‘smooth’, or ‘loud’. It provides a natural context for introducing concepts like ‘full’ and ’empty’, ‘more’ and ‘less’, and ‘in’ and ‘out’.
Gathering your toolkit from pantry to craft store
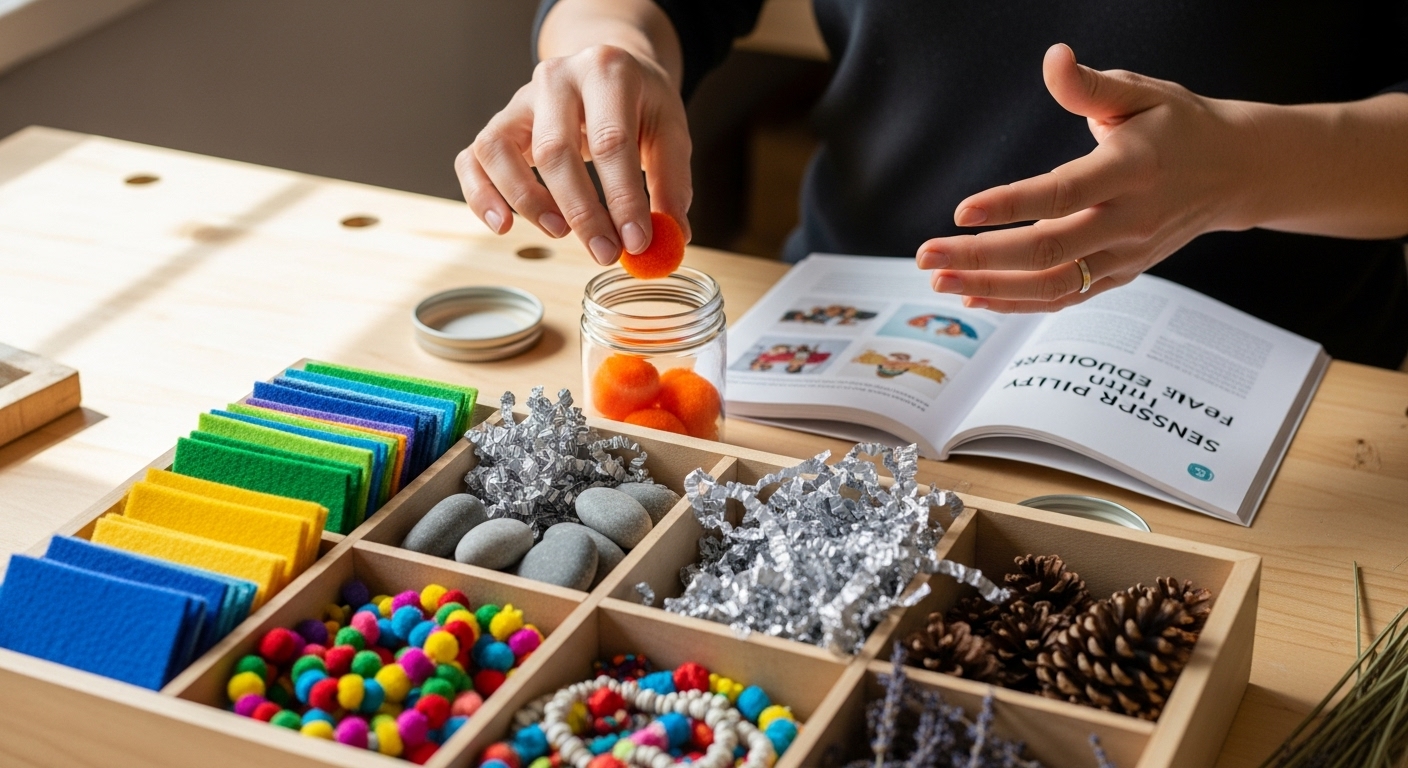
Creating an effective sensory station toolkit does not require a hefty budget or a trip to a specialty toy store. Your home is likely already a treasure trove of materials waiting to be discovered. The key is to think creatively about texture, sound, and purpose. Start in the kitchen pantry. Uncooked rice, dried pasta in various shapes, lentils, beans, oats, cornmeal, and flour are all fantastic bases for sensory bins. They provide wonderful tactile experiences and can be easily scooped, poured, and sorted. Remember to use items appropriate for your child’s age and always supervise to prevent ingestion. Next, look at your recycling. Cardboard tubes from paper towels, plastic bottles, egg cartons, and small boxes can be transformed into shakers, building blocks, or sorting trays. These upcycled materials teach a valuable lesson about sustainability. For your crafting supplies, consider items like pom-poms, pipe cleaners, craft feathers, large buttons, and yarn. These add pops of color and a variety of textures. Don’t forget the tools. Kitchen utensils like spoons, measuring cups, funnels, and tongs are perfect for developing fine motor skills. Silicone cupcake liners are great for sorting, and a simple plastic bin or a large baking tray can serve as the designated play area, keeping the mess contained. Finally, step outside. Natural elements like leaves, smooth stones, twigs, pinecones, and sand bring the outdoors in and offer a rich, multi-sensory experience that connects children to the natural world around them.
Crafting toys for tactile and fine motor development
Tactile play is often the star of the sensory station, providing rich feedback that is both calming and educational. Creating toys that focus on touch and fine motor skills is remarkably simple. One of the easiest and most effective creations is a set of ‘texture boards’. Simply take squares of sturdy cardboard and glue on different materials; a piece of sandpaper, a swatch of soft velvet, a patch of bumpy bubble wrap, a few lines of cotton balls, and some corrugated cardboard. These boards help children explore and describe different textures. Another classic is homemade playdough. A simple recipe of flour, salt, water, cream of tartar, and oil can be customized endlessly. Add a few drops of food coloring for visual appeal or a bit of vanilla extract or lavender oil for a scent-based experience. Kneading, rolling, and stamping the dough is a fantastic workout for little hands. For a brilliant fine motor challenge, create a ‘threading station’. Large, tube-shaped pasta like penne or rigatoni can be threaded onto a shoelace or a piece of yarn. To make it easier for small hands, wrap a piece of tape around the end of the yarn to create a makeshift needle. This activity requires concentration, patience, and precise hand-eye coordination. A ‘scoop and transfer’ station is another winner. Fill a bin with a base like dried beans or large pasta, and provide various tools like spoons, scoops, and small cups. The simple act of moving materials from one container to another is deeply engaging and builds foundational skills for tasks like writing and self-feeding.
Product Recommendation:
- 117 PCS Party Favors for Kids 4-8 8-12, Pop Fidget Toys, Treasure Box for Classroom, Pinata Filler, Goodie Bag Stuffers, Prize Box, Treasure Chest, Classroom Prizes
- Remote Control Car, RC Cars Toys for Kids Ages 6-12, 4WD Stunt Car with LED Lights & 360° Flips, 2.4GHz, Upgraded USB-C Modular Batteries, 8-10 Year Old Boys 1-Blue
- Flybar My First Foam Pogo Jumper for Kids Fun and Safe Pogo Stick for Toddlers, Durable Foam and Bungee Jumper for Ages 3 and up, Supports up to 250lbs
- FLUESTON LCD Writing Tablet, Doodle Board Toys Gifts for 3-8 Year Old Girls Boys, 10 Inch Colorful Electronic Board Drawing Pad for Kids, Gifts for Toddler Educational Learning Travel Birthday, Blue
- Remote Control Dinosaur, Realistic Dinosaur Toys for Kids 3-5, 2.4GHZ, Walking,Rechargeable, 3D Eyes, 3 Sound Effects, Demo Function, Jurassic Toys for Christmas, Kids 3+
Engaging sight and sound with homemade creations
While touch is a primary focus, stimulating the senses of sight and sound adds crucial layers to developmental play. Visual and auditory toys help children learn about cause and effect, develop pattern recognition, and explore rhythm. You can craft these engaging toys with minimal effort. For an auditory experience, create a set of ‘sound shakers’. Use small, securely sealed plastic bottles or containers. Fill each one with different materials like rice, beans, paper clips, or small bells. Each shaker will produce a distinct sound. You can even wrap them in colored paper and play a matching game where your child has to find the two shakers that sound the same. A ‘rainstick’ is another beautiful auditory toy. Take a cardboard tube, push several pipe cleaners or pieces of crumpled aluminum foil inside to create baffles, and fill it with a small amount of rice or lentils before sealing both ends. When you turn it over, it creates a gentle, soothing sound reminiscent of falling rain. For visual stimulation, a ‘color sorting’ game is a must-have. This can be as simple as painting a few sections of an egg carton in different primary colors. Then, provide a bowl of colorful pom-poms, large buttons, or painted rocks for your child to sort into the matching colored cups. This activity not only teaches color recognition but also reinforces one-to-one correspondence, a key pre-math skill. If you have a translucent bin, you can create a simple DIY light table by placing a string of battery-operated LED lights underneath it. Tossing in translucent objects like colored plastic shapes or water beads creates a mesmerizing visual experience that encourages exploration and discovery.
Assembling your sensory station or calm-down corner
Once you have gathered your materials and crafted a few toys, the next step is to create an inviting and functional space. Designating a specific area for sensory play helps manage mess and signals to your child that this is a special place for hands-on exploration. This ‘sensory station’ does not need to be large. A small corner of a playroom or even the kitchen floor can work perfectly. The key element is a container to hold the activities. A shallow, under-the-bed storage bin is an excellent choice as its low sides provide easy access for little ones. A large baking sheet or a tuff tray also works well to define the play space. Organization is your best friend. Use small baskets or clear containers to store different materials like pom-poms, tools, and natural items. This not only keeps things tidy but also allows your child to see their options and make choices, fostering independence. Consider the concept of rotation. Instead of putting out all your sensory materials at once, rotate them every week or two. This keeps the station feeling fresh and exciting, preventing your child from becoming overwhelmed or bored. You might have a ‘dinosaur dig’ theme one week with sand and toy dinosaurs, followed by a ‘water world’ theme the next with water, blue food coloring, and sea creatures. This space can also double as a ‘calm-down corner’, a concept gaining popularity for helping children with emotional self-regulation. By including soothing materials like soft playdough, a rainstick, or a weighted lap pad, the sensory station becomes a safe retreat where a child can go to calm their body and mind when they feel overwhelmed.
Prioritizing safety in every homemade toy
While the creativity and developmental benefits of DIY sensory toys are immense, safety must always be the number one priority. Because these toys are intended for hands-on, and sometimes mouth-on, exploration, a vigilant approach to their creation and use is non-negotiable. The most significant concern for infants and toddlers is choking hazards. A good rule of thumb is that any object that can fit through a cardboard toilet paper tube is too small for a child under three years old. When choosing bases for sensory bins, opt for larger items like big pasta shapes or dried chickpeas instead of tiny grains like rice if your child is still in the mouthing phase. Or, consider taste-safe options like a bin of Cheerios or blended-up graham crackers. Always ensure that any small parts on homemade toys, like buttons or beads, are securely attached and regularly checked for looseness. Material selection is equally critical. Use non-toxic craft supplies, such as water-based paints and non-toxic glue. When making playdough or slime, use food-grade ingredients. Be mindful of potential allergens, especially if other children will be using the station. Finally, and most importantly, supervision is mandatory. Sensory play should always be a supervised activity. This allows you to guide the play, ensure materials are being used safely, and intervene immediately if a potential hazard arises. It is also a wonderful opportunity to bond with your child, sharing in their discoveries and celebrating their creativity. By embedding these safety practices into your process, you can ensure that your sensory station is a place of joyful, worry-free learning and exploration.
Creating a sensory station toolkit is far more than just a crafty weekend project; it is an investment in your child’s holistic development. By transforming simple, everyday materials into engaging developmental toys, you are providing the building blocks for cognitive growth, motor skills, and emotional intelligence. We have walked through the incredible science behind sensory play, explored the treasures hidden in your pantry and recycling bin, and detailed how to craft toys that delight the senses of touch, sight, and sound. We also covered the practical steps of setting up an organized station and the paramount importance of safety in every creation. The journey of making these toys is as valuable as the play itself. It is a chance to connect with your child, to observe their unique interests, and to foster a love of learning that is rooted in curiosity and discovery. Remember that the goal is not perfection but participation. Your homemade shakers and textured boards carry a personal touch that no store-bought item can replicate. So embrace the mess, celebrate the creativity, and watch with pride as your little one explores, learns, and grows through the powerful magic of sensory play. Start small, gather your toolkit, and begin building a world of wonder at home today.