The digital beauty landscape is constantly evolving, with new trends emerging from the creative corners of social media every day. The latest phenomenon to capture the imagination of makeup enthusiasts everywhere is the ‘sunset blush’ technique. This viral trend, seen all over TikTok and Instagram, moves beyond the traditional single swipe of color, inviting users to paint a vibrant, multi-tonal masterpiece on their cheeks. It’s an artistic approach to makeup that mimics the breathtaking gradient of a sunset, blending warm pinks, radiant oranges, and shimmering golds for a look that is both bold and beautifully ethereal. The appeal lies in its ability to create unparalleled dimension and a healthy, lit-from-within glow that a single shade simply cannot replicate. This guide will serve as your masterclass, walking you through the origins of this trend, how to select the perfect color palette for your skin tone, and the step-by-step application process to achieve a flawless, blended finish. We will also explore customization techniques and common pitfalls to avoid, ensuring you can master this stunning look with confidence.
What exactly is the sunset blush trend
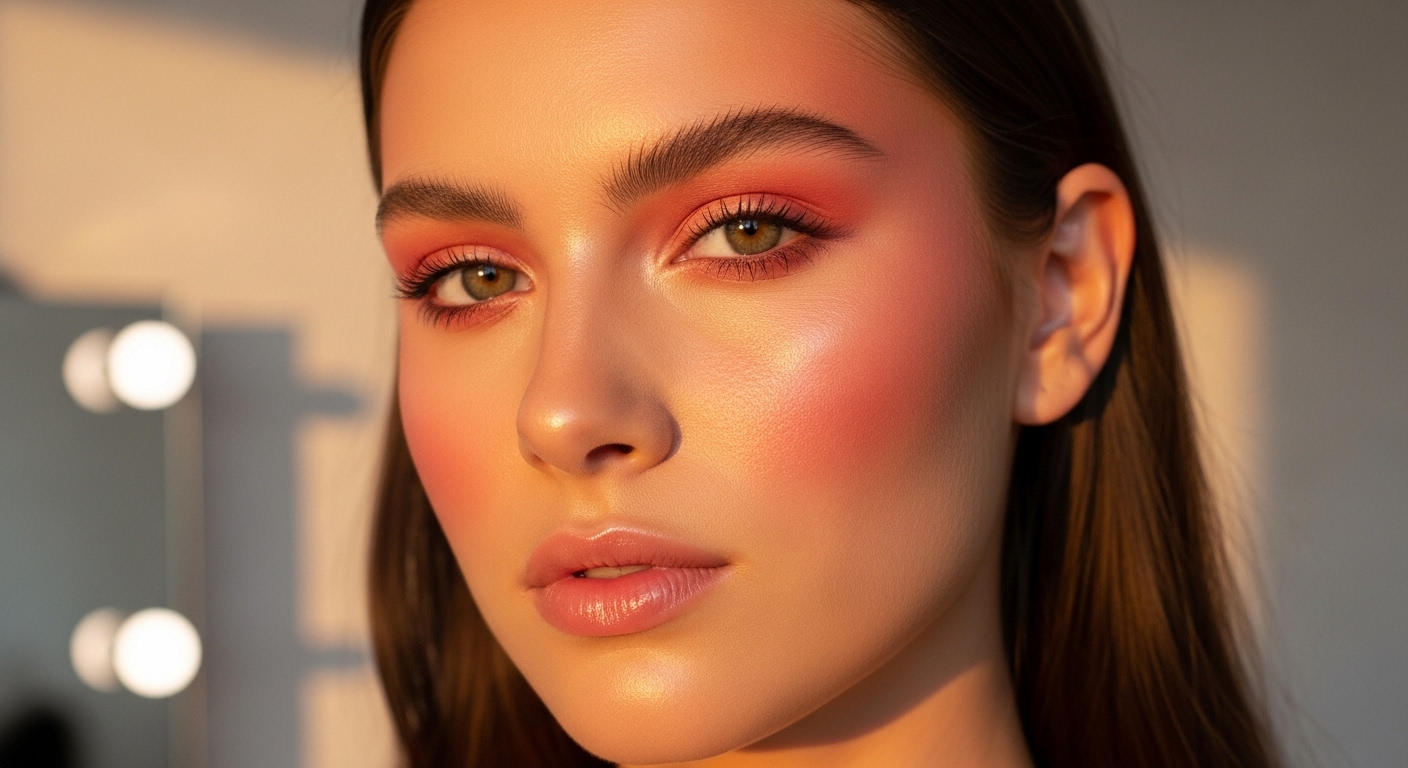
At its core, the sunset blush trend is an application method that uses multiple shades of liquid or cream blush to create a gradient effect across the high points of the face. Imagine the sky as the sun dips below the horizon; you see a seamless transition from a bright, light hue to deeper, warmer tones. This technique aims to replicate that natural spectacle on your skin. Popularized by creators on platforms like TikTok, it challenges the long-standing practice of using one blush color. Instead, it encourages a more painterly approach. Typically, the process involves strategically placing dots of at least two or three different blush colors along the cheekbone. This often starts with a light pink or peach shade near the undereye area, transitions to a vibrant coral or orange in the middle, and finishes with a deeper berry or bronze tone towards the temple. The magic happens in the blending, where these distinct colors are gently diffused into one another to create a cohesive, multi-dimensional flush. The reason for its immense popularity is its visual impact. It adds incredible warmth, shape, and radiance to the face, making the cheeks appear fuller and more sculpted while delivering a vibrant, healthy-looking glow that feels both modern and romantic. It’s a departure from subtle, barely-there makeup and an embrace of color and creativity.
The art of color selection for your skin tone
Mastering the sunset blush look begins with choosing the right colors, and this is where a basic understanding of color theory becomes your greatest asset. The goal is to select shades that not only complement each other but also flatter your unique skin tone. For a harmonious blend, it’s best to choose colors that belong to the same family, such as different variations of pinks and reds or a spectrum of peaches and oranges. For fair skin tones, a delicate sunset effect can be achieved with soft, pastel shades. Think of starting with a baby pink, moving into a soft peach, and finishing with a light coral. These colors provide a beautiful warmth without overwhelming a lighter complexion. For medium skin tones, you can embrace more vibrancy. A beautiful combination could be a bright coral, a vivid hot pink, and a rich rose shade. These saturated hues will pop beautifully against a medium complexion, creating a striking yet balanced effect. For deep skin tones, the key is to use rich, highly pigmented shades that won’t get lost. A fiery orange, a deep magenta, and a warm berry or plum will create a stunning, dramatic sunset that enhances the skin’s natural warmth. When selecting products, pay attention to their finish. Liquid and cream blushes are ideal for this technique because their emollient textures are easy to blend seamlessly. A dewy or satin finish will also enhance the ‘lit-from-within’ glow that is central to this look.
Essential tools and product picks
While the technique itself is artistic, having the right tools and products is crucial for a clean, professional-looking result. The stars of this show are undoubtedly liquid or cream blushes. Their blendable nature is non-negotiable for creating the smooth gradient that defines the sunset blush. Powder blushes can be tricky to layer in this manner and may result in a patchy or muddy finish. Look for formulas known for their pigmentation and ease of blending. Brands like Rare Beauty with their Soft Pinch Liquid Blush or Saie with their Dew Blush have become fan favorites for this very reason, offering a wide range of shades with a lightweight, buildable texture. You will need at least two, but preferably three, distinct colors to create the gradient; a light, a medium, and a deep tone within the same color family. Beyond the blush itself, your blending tool is your most important ally. A damp makeup sponge is an excellent choice as it pushes the product into the skin for a natural, seamless finish while absorbing any excess. Alternatively, a dense, synthetic blush brush can also work well. You might even use your fingers, as the warmth from your skin can help melt the products together beautifully. It’s also wise to have a clean brush or a clean side of your sponge ready for the final blending step to ensure the colors diffuse into each other without becoming a single, muddled shade. A good setting spray can also be your final step to lock everything in place, especially if you’re using dewy-finish products.
Product Recommendation:
- pigpigboss Rotate Mirror Paint with Diamonds, Landscape Diamond Painting Mirrors Kit, Mountain Diamond Art Painting Makeup Mirror for Adult, Crystal Drill Painting Mirror for Desktop Decor
- Blue Squid PRO Face Paint – Professional Water Based Single Cake Facepaint & Body Paints – SFX Makeup, Kids Adults Face Painting for Costume, Halloween, Cosplay – Classic Black & White 30g / 1oz
- All In One Makeup Gift Kit – Ultimate Color Combination – 36 Eyeshadow, 28 Lip Gloss, 3 Blusher, 4 Concealer, 3 Contour Powder, 3 Brushes, 1 Mirror, 74 Colors Palette Set
- Makeup Kit For Women Full Kit Eyeshadow Eyeliner lipgloss, Lipstick Makeup brushes Mascara Eyebrow pencil Concealer Face Powder Primer make up Set For Girls Beginners
- Makeup Set for Women, Makeup Full Kit for Beginners & Professionals, Travel Makeup Set for Teens & Adults, Makeup Gift Set for Girls, Eyeshadow Palette, Lip Gloss, Face & Eye Make up
A step-by-step guide to flawless application
Achieving the perfect sunset blush is all about strategic placement and careful blending. Follow these steps for a stunning result every time. First, complete your base makeup as you normally would. This technique works best over a foundation or tinted moisturizer that is still slightly dewy, as it helps the cream blushes meld with the base. Next comes the placement. Using the applicator of your liquid blush or your finger, place one or two small dots of your lightest shade on the highest point of your cheekbone, just below and slightly out from the outer corner of your eye. Then, place dots of your medium shade directly next to the first set, moving down the cheekbone towards the center of your face. Finally, place dots of your deepest shade adjacent to the medium ones, extending towards your hairline or temple. You should have a row of colored dots forming a gentle upward curve. Now for the most critical part is blending. Start by blending the lightest color first, using a tapping or stippling motion with your damp sponge or brush. Gently diffuse the edges without spreading the color too far. Next, move to the medium shade, blending it in place and then softly tapping where it meets the light shade to begin creating the gradient. Finally, blend the deepest shade, again focusing on diffusing its edges and merging it with the medium tone. For the final touch, use a clean part of your sponge or a clean brush to lightly tap over the entire area, ensuring there are no harsh lines between the colors. The goal is a seamless transition, not three distinct stripes of color.
Customizing the sunset for your face shape
While the general technique for sunset blush remains consistent, adjusting the placement can help you tailor the look to flatter your specific face shape. This small tweak can make a significant difference, enhancing your features in the most complimentary way. For those with an oval face shape, you are in luck. The standard application along the high points of the cheekbones, sweeping upwards towards the temples, works perfectly to accentuate your naturally balanced proportions. If you have a round face shape, the goal is often to create more definition and lift. To achieve this, apply the blush gradient slightly higher than you normally would and extend the deepest shade further up towards the temple in a more angular, C-shaped motion. This upward placement helps to elongate the face and create the illusion of more sculpted cheekbones. For a square face shape, which is characterized by a stronger jawline, the sunset blush can be used to add softness. Concentrate the application on the apples of the cheeks and blend the gradient upwards, but keep it more rounded and diffused. Avoid extending the color too far out to the sides, as this can add more width. Instead, focus on creating a soft, radiant glow in the center of the face. For a heart-shaped face, where the forehead is wider and the chin is more pointed, apply the blush in a C-shape starting from the temples and curving down onto the apples of the cheeks. This helps to balance the proportions by adding fullness to the lower part of the cheek area.
Avoiding common mistakes and advanced tips
As with any makeup technique, there are a few common pitfalls to be aware of when attempting the sunset blush. One of the biggest mistakes is using too much product. Liquid blushes are often highly pigmented, and a small dot goes a long way. It’s always easier to add more than to take away, so start with a minimal amount and build up the intensity as needed. Another frequent error is over-blending. While you want a seamless gradient, blending too vigorously can cause the colors to merge into one muddy shade, defeating the purpose of the multi-tonal look. Blend each color section gently before lightly diffusing the meeting points. Choosing clashing colors can also ruin the effect; stick to shades within the same family for a cohesive look. For those looking to elevate their sunset blush, here are a few advanced tips. Incorporate a dot of liquid highlighter as your lightest ‘shade’ right at the highest point of the cheekbone for an extra pop of radiance. This creates a beautiful ‘sunset gleam’. To increase the longevity of your look, you can lightly set the cream products with a translucent powder or a coordinating powder blush, gently pressing it on with a fluffy brush. For a truly cohesive and high-fashion look, take a small amount of your blush shades and gently tap them onto your eyelids, mimicking the same gradient pattern. This creates a stunning monochromatic effect that ties the entire look together beautifully.
In conclusion, the sunset blush technique is far more than a fleeting social media trend. It is a celebration of color, creativity, and personal expression in makeup. By moving beyond the limitations of a single shade, you unlock the ability to create a look with incredible depth, dimension, and a radiant glow that truly looks like it’s coming from within. This masterclass has guided you through every step, from understanding the core concept to selecting the perfect hues for your skin tone and mastering the art of application and blending. We have explored how to customize the placement for your face shape and how to avoid common errors while adding advanced touches for a professional finish. The true beauty of the sunset blush lies in its versatility. It encourages you to play, to experiment with color combinations, and to view your face as a canvas. So embrace the spirit of the sunset, pick up your favorite shades, and have fun painting your own unique, breathtaking glow. It’s time to let your creativity shine and prove that sometimes, more is more.