
The steady sweep of a mechanical watch’s second hand is more than just a way to tell time; it’s the visible heartbeat of a complex, living machine on your wrist. For many enthusiasts, the allure goes beyond simply wearing the timepiece. It extends to understanding and even influencing its performance. The idea of personally fine-tuning your watch’s accuracy, a process known as regulation, can seem daunting. Yet, with the right knowledge and a steady hand, it is an incredibly rewarding skill. This journey transforms you from a passive owner into an active participant in your watch’s life. This guide demystifies the process entirely. We will explore the fundamentals of what makes a watch run fast or slow, detail the essential tools you’ll need for the job, and provide a clear, step-by-step walkthrough of the regulation process. By the end, you will have the confidence to open up your timepiece and make those minute adjustments that separate a good watch from a great one, all tuned by you.
Understanding mechanical watch accuracy
Before you can adjust a watch, you must first understand the forces at play. A mechanical watch’s accuracy is not a static feature but a dynamic result of several interacting factors. The core of this system is the balance wheel and its hairspring, which oscillate back and forth, acting as the timekeeping element. The rate of these oscillations determines the watch’s speed. Several key concepts are vital to grasp. ‘Rate’ is the most straightforward; it’s the amount of time a watch gains or loses per day, usually expressed in seconds per day (s/d). A watch running at +5 s/d is gaining five seconds daily. Then there is ‘isochronism’, which is the ability of the balance to beat at the same rate regardless of its amplitude or how fully wound the mainspring is. A watch with poor isochronism might be accurate when fully wound but lose time significantly as it winds down. Positional variance is another major factor. Gravity affects the balance wheel differently depending on the watch’s orientation, such as dial up, crown down, or dial down. This is why chronometer certifications like those from COSC test watches in multiple positions. Finally, external influences like temperature changes and magnetism can wreak havoc on accuracy. Temperature can cause the hairspring to expand or contract, while a magnetized hairspring can cause its coils to stick together, drastically speeding up the watch. Understanding these variables provides the context for why your watch behaves the way it does and what you are truly adjusting when you begin the regulation process.
The essential toolkit for regulation
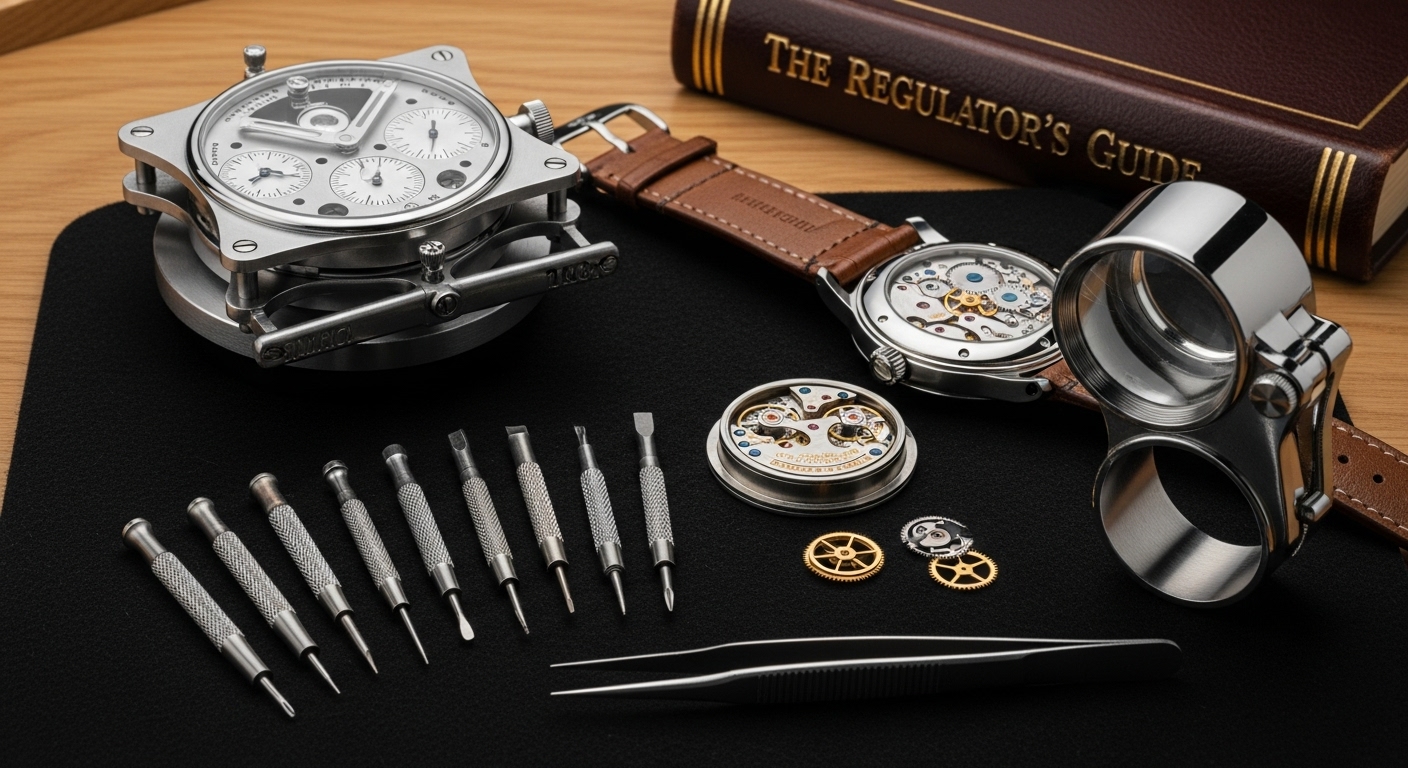
Embarking on the journey of watch regulation requires a specific set of tools. Attempting this task without the proper equipment is a sure way to damage your timepiece. The single most important investment is a ‘timegrapher’. This electronic device listens to the ‘tick-tock’ of your watch’s movement and provides immediate, precise data on its rate, beat error, and amplitude. It is virtually impossible to regulate a watch accurately without one. Next, you will need a quality case back opener. For screw-down case backs, a Jaxa-style wrench is standard. For other types, a sticky ball or a specialized case knife might be necessary. Once inside the watch, you will be working with minuscule components, so a watchmaker’s ‘loupe’ or another form of magnification is non-negotiable. You cannot adjust what you cannot see clearly. Perhaps the most critical hand tool is a pair of ‘non-magnetic tweezers’. The hairspring is incredibly susceptible to magnetization, and using standard steel tweezers near it is a recipe for disaster. Always ensure your tweezers are made of brass, carbon fiber, or another non-ferrous material. A small, handheld dust blower is also essential for clearing any specks of dust from the movement before closing the case. A soft cloth or case cushion will provide a safe surface to rest the watch on. As a final preparation, it’s wise to have some high-quality, precision screwdrivers on hand, as you may need to remove a rotor or other components to get a clear view of the balance assembly on some automatic movements.
Preparing your watch for surgery
With your tools assembled, the next phase involves careful preparation. The environment in which you work is just as important as the tools you use. Find a clean, well-lit, and dust-free area. A desk clear of all clutter is ideal. Before you even think about opening the watch, it is good practice to let the mainspring wind down to about half power. A fully wound mainspring can exert a lot of force, which can be problematic if something slips. Also, ensure the watch and your hands are perfectly clean to avoid transferring any dirt or oils into the delicate movement. The process of opening the case back requires patience. If you have a screw-down back, use your Jaxa wrench to carefully engage the notches and turn it counter-clockwise. Apply steady, even pressure to avoid slipping and scratching the case. If you have a snap-on case back, you will need to find the small lip or tab, usually located between one set of lugs, and use a case knife to gently pry it open. A sticky ball can be a surprisingly effective and safe alternative for some screw-down backs, as it relies on friction and reduces the risk of scratches. Once the back is off, take a moment to observe the movement. Use your dust blower to gently puff away any dust particles that may have settled on the surface. You are now ready to identify the key components you will be adjusting. This preparatory stage is about minimizing risk and setting yourself up for a successful regulation.
Product Recommendation:
- Timex Expedition Camper Men’s 39 mm Watch
- Amazfit T-Rex 3 Outdoor Smart Watch 48mm AMOLED Display, Offline Maps & Navigation, 6 Satellite Systems Dual Band GPS, 27 Days Battery Life, 170+ Sports Mode, 45m Freediving for Android, iPhone
- Nine West Women’s Strap Watch
- Smart Watch for Men Women Compatible with iPhone Samsung Android Phone 1.83 inch Full Touch Screen IP68 Waterproof Bluetooh Fitness Tracker Heart Rate/Sleep Monitor, Black
- Timex Expedition Metal Field 39mm Men’s Analog Watch | Brown Natural Leather Strap | INDIGLO Backlight and Luminous Hands | 24 Hour Time | Quick Date Function | Rugged Outdoor Watch | 50M Water Resistance
Identifying the key components on the balance
Once the case back is removed, you are looking at the heart of the watch. It can appear as a dizzying array of gears, springs, and jewels. Your focus, however, is on a very specific area known as the balance assembly. Look for the rapidly oscillating wheel; this is the ‘balance wheel’. At its center, you will see the ‘hairspring’, a tiny, spiraled spring that looks like a metallic spiderweb. This spring is what makes the balance wheel oscillate back and forth at a precise frequency. Now, look closely at the bridge or cock that holds the balance wheel in place. You will see two tiny levers, or arms, extending over the hairspring. These are the critical parts you will interact with. One arm, often marked with a ‘+’ and ‘-‘ symbol, is the ‘regulator arm’. This arm holds two small pins, called curb pins, that the hairspring passes through. By moving this arm, you change the effective length of the hairspring, which in turn speeds up or slows down the watch. The second arm, located very close to the first, is the ‘beat error stud’ or stud carrier. This arm holds the outer end of the hairspring in a fixed position. Adjusting this stud changes the resting position of the balance wheel, allowing you to correct the beat error. It is absolutely crucial to correctly identify these two separate arms. Confusing them and moving the wrong one can throw your watch’s timing off completely. Take your time, use your loupe, and be one hundred percent certain you know which arm controls the rate and which controls the beat error before proceeding.
The art of adjusting the rate
This is the moment of truth. With the watch on the timegrapher, you will get a baseline reading. Let’s say it shows a rate of +15 seconds per day. Your goal is to bring that number as close to zero as possible. The key here is to make ‘incredibly small’ adjustments. The regulator arm is extraordinarily sensitive. A movement that is barely perceptible to your eye can change the rate by 10 to 20 seconds per day or more. Using your non-magnetic tweezers, gently nudge the regulator arm. To slow the watch down (to correct the +15 s/d reading), you need to make the hairspring effectively longer. This usually means moving the arm ‘away’ from the beat error stud. To speed a watch up, you would move it ‘towards’ the stud. After your first tiny nudge, place the watch back on the timegrapher and observe the new reading. Perhaps it now reads +8 s/d. You are going in the right direction. Nudge it again, even more gently this time. Now it might read +1 s/d. This is an excellent result. The process is one of trial and error; adjust, measure, repeat. Do not get frustrated if you overshoot your target. If you move it too far and the watch is now running at -5 s/d, simply nudge it back in the opposite direction. Patience is your greatest virtue here. Rushing will only lead to overcorrection and frustration. Aim for a stable rate in a common position like dial-up first, and remember that perfection is the enemy of good. An average rate between 0 and +5 s/d is a fantastic outcome for a home regulation.
Correcting the beat error
Once you are satisfied with the watch’s rate, you can look at the beat error. The timegrapher will display this value, typically in milliseconds (ms). Beat error represents an asymmetry in the balance wheel’s oscillation. A perfect beat error of 0.0ms means the swing in one direction takes the exact same amount of time as the swing in the other. A high beat error, for example over 1.0ms, can affect the watch’s stability and accuracy in different positions. For most modern movements, a beat error under 0.6ms is perfectly acceptable, and many experts advise beginners not to chase a perfect zero. If you decide the beat error is high enough to warrant adjustment, you must carefully move the ‘beat error stud’, not the regulator arm. This is a more delicate task. The stud carrier holds the hairspring’s anchor point, and adjusting it re-centers the impulse jewel within the pallet fork at the balance’s rest position. As with the regulator, you must use your non-magnetic tweezers to make a minuscule nudge. Move the stud carrier slightly, then check the timegrapher. You will see the beat error number change. You will also notice that adjusting the beat error can slightly affect the rate, which is why it’s often best to get the beat error in an acceptable range first, and then perform the final rate adjustment. Because this adjustment is more integral to the escapement’s function, it carries a slightly higher risk. If your watch’s beat error is already low, it is often best to leave it alone and enjoy your newly regulated rate accuracy.
Regulating your own mechanical watch is a journey into the soul of your timepiece. It elevates your appreciation from the aesthetic to the mechanical, fostering a deeper connection. As we have seen, the process is methodical, not magical. It begins with understanding the principles of accuracy, from isochronism to positional variance. Success then hinges on acquiring the proper tools; a timegrapher, non-magnetic tweezers, and a good case opener are not optional luxuries but essential instruments for a safe and effective adjustment. The preparation phase, emphasizing cleanliness and careful handling, sets the stage for the delicate work to follow. Identifying the regulator arm and beat error stud is the critical moment of truth before any adjustments are made. The actual regulation is an art of patience, involving tiny, incremental nudges and constant verification with the timegrapher. While correcting the rate is the primary goal, understanding and adjusting beat error represents a higher level of refinement. Remember that the goal is not absolute perfection but significant improvement and the satisfaction of a job well done. By following these steps, you take control of your watch’s performance, ensuring its tiny, mechanical heart beats as accurately and reliably as possible, all thanks to your own steady hand.