
In the modern home, we are more aware than ever of our environmental footprint. We recycle, we conserve water, and we seek out sustainable products. Yet, a significant stream of waste often goes overlooked right in our own kitchens. Every day, countless vegetable peels, coffee grounds, and eggshells are tossed into the bin, destined for a landfill where they contribute to methane gas production. But what if there was a simple, almost magical way to transform this waste into something incredibly valuable? This is the soil maker’s secret, a straightforward method for turning everyday kitchen scraps into ‘black gold’, a nutrient-dense compost that can breathe new life into your garden and houseplants. Embracing this practice is a cornerstone of a truly green home lifestyle. It’s not just about reducing waste; it’s about creating a closed-loop system in your own home, participating in the regenerative cycle of nature. This guide will walk you through the entire process, from understanding the fundamentals of compost to harvesting your very own batch of rich, dark soil amendment.
Understanding the magic of black gold
So, what exactly is this ‘black gold’ we speak of? The term is an affectionate nickname for finished compost, a dark, crumbly, and earthy-smelling organic material that is a powerhouse of nutrients for plants. It is the result of a natural process of decomposition, where microorganisms like bacteria, fungi, and worms work to break down organic matter into a stable, soil-like substance. The magic lies in this transformation. When you create a compost pile, you are essentially harnessing and accelerating a process that has been happening in nature for millennia. Instead of letting your food scraps rot anaerobically in a landfill and produce harmful greenhouse gases, you are facilitating an aerobic process that creates a life-giving resource. This is a fundamental principle of a green home lifestyle, moving from a linear model of ‘take, make, dispose’ to a circular one of ‘use, decompose, regenerate’. The benefits are immense. Adding compost to your soil improves its structure, making it better at retaining moisture and reducing the need for watering. It also enhances aeration, allowing plant roots to breathe and grow stronger. Most importantly, it slowly releases a complex array of essential nutrients and beneficial microbes that feed your plants and protect them from diseases, all without the need for chemical fertilizers. It is nature’s perfect plant food.
Choosing your simple composting method
Getting started with composting doesn’t require a huge backyard or expensive equipment. There are several simple methods that can fit almost any living situation. The key is to choose the one that best suits your space and lifestyle. For those with a bit of outdoor space, even a small balcony or patio, a simple compost bin is an excellent choice. You can purchase a ready-made tumbler or a stationary bin, or you can easily build one yourself from wood pallets or wire mesh. The basic principle is to create a contained pile that you can add to over time. A ‘cold’ or passive composting method is the simplest of all. You simply layer your kitchen scraps and yard trimmings in the bin and let nature take its course. It takes longer than more active methods, often six months to a year, but it requires very little effort beyond adding new material. For apartment dwellers or those with no outdoor space, vermicomposting, or worm composting, is a fantastic solution. A worm bin is a compact, self-contained system that can be kept indoors in a closet, under the sink, or on a sheltered balcony. Red wiggler worms are the stars of this show, efficiently and odorlessly processing your kitchen scraps into some of the most nutrient-rich compost and ‘worm tea’ available. These systems are surprisingly clean and low-maintenance once established, making them a perfect fit for an urban green lifestyle.
The perfect recipe greens and browns
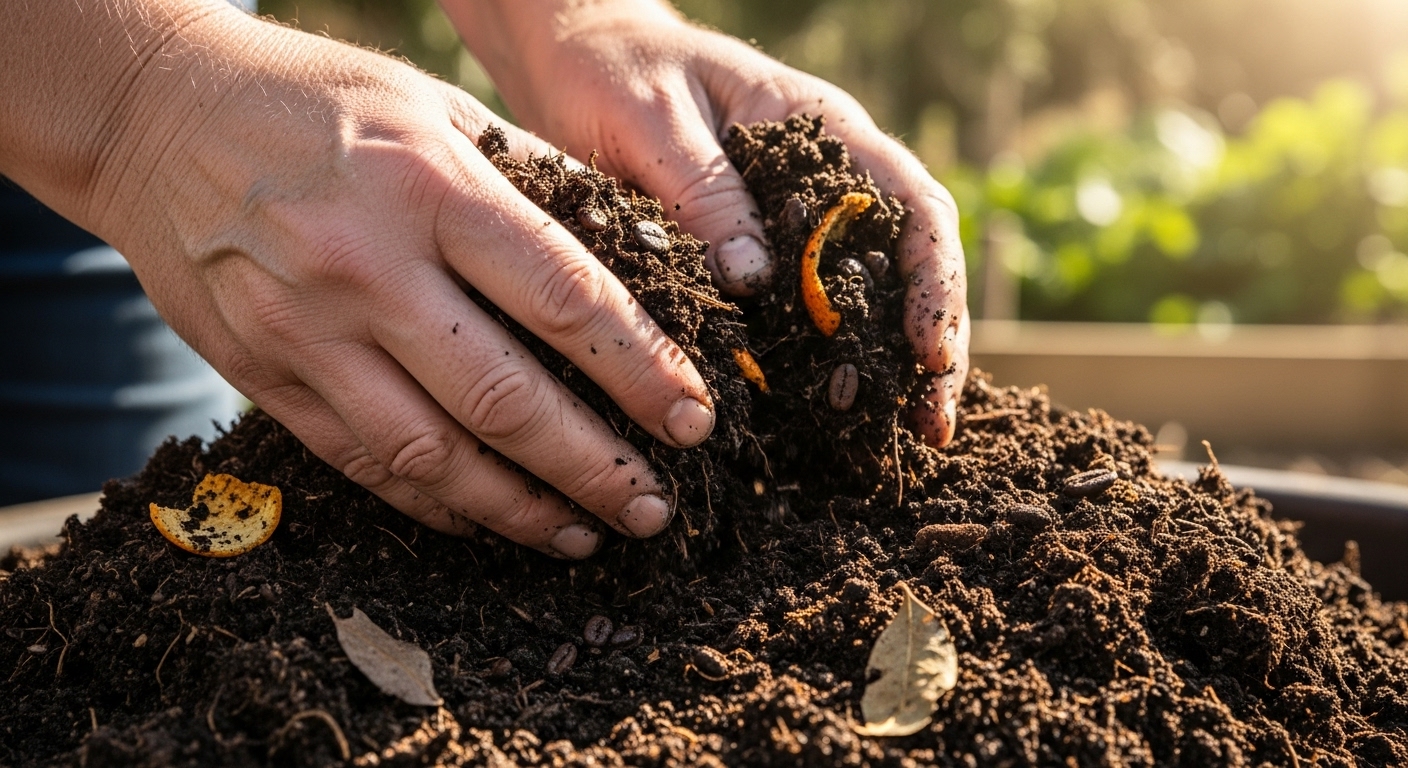
Creating healthy, odor-free compost is a bit like baking a cake; it’s all about getting the ingredients right. In the world of composting, the two main ingredients are ‘greens’ and ‘browns’. This terminology refers to the carbon-to-nitrogen ratio, a crucial factor for an efficient decomposition process. ‘Greens’ are the nitrogen-rich materials. These are typically wet, fresh items that break down quickly. Think of your kitchen scraps like fruit and vegetable peels, coffee grounds, tea bags, and fresh grass clippings. These materials provide the essential proteins and nutrients that fuel the microbial population in your compost pile. ‘Browns’, on the other hand, are the carbon-rich materials. These are usually dry, woody items that provide structure and aeration to the pile, preventing it from becoming a slimy, smelly mess. Examples of browns include dried leaves, shredded cardboard, paper towel rolls, newspaper, sawdust, and small twigs. They are the energy source for the decomposer organisms. The secret to a happy compost pile is to maintain a good balance between these two. A general rule of thumb is to aim for a ratio of about two to three parts browns to one part greens by volume. So, every time you add a bucket of kitchen scraps (greens), you should try to add two or three buckets of shredded leaves or cardboard (browns). This balance ensures that the microorganisms have everything they need to work efficiently, resulting in faster decomposition and a pleasant, earthy smell rather than an unpleasant odor.
Product Recommendation:
- Sustainable Market Farming: Intensive Vegetable Production on a Few Acres
- FOSSA Duvet Cover Set 100% Washed Cotton Linen Feel Super Soft Breathable Cozy 3 Pieces Bedding Sets Solid Pale Brown Super King Plus
- TroyStudio Thickened Acoustic Panels, 31.5 x 23.6 x 0.5 Inches Pack of 6 Felt Wall Decor Tile Sound Absorbing Board, Noise Reverb Echo Dampening Soundproof Padding for Door Music Recording Home Studio
- Deconovo Semi-Sheer Linen Curtains – Light Filtering & Privacy Enhancing – Modern Textured Drapes with Back Tab & Rod Pocket – 2 Panels for Living Room, Bedroom & Patio, Flaxen, 50Wx108L
- Istana 2×3 Area Rug – Dark Grey Boho Rugs for Living Room 2×3 – Foldable Small Rugs for Bedroom – Stain Resistant Washable Rug Non Slip – Eco-Friendly Area Rugs Indoor
What to compost and what to avoid
Knowing what you can and cannot put in your home compost bin is essential for success and for avoiding common problems like pests and foul odors. The ‘yes’ list is long and includes most of your plant-based kitchen waste. All fruit and vegetable scraps are fantastic additions, including peels, cores, and rinds. Coffee grounds and paper filters, tea leaves and bags (just be sure to remove any staples), and crushed eggshells are also excellent sources of nutrients. Stale bread, grains, and pasta can be added in moderation. From the yard, you can add grass clippings, leaves, and small twigs. Even household items like shredded newspaper, non-glossy cardboard, paper towel tubes, and cotton or wool fabric scraps can be composted. However, the ‘no’ list is just as important to follow. You should always avoid adding meat, fish, and bones to a simple home compost pile, as these materials can attract unwanted pests like rodents and can produce very strong, unpleasant odors as they decompose. Similarly, dairy products like cheese and yogurt, as well as fats, grease, and oily foods, should be kept out of the bin. These items can coat other materials, creating an anaerobic environment that leads to a slimy, smelly pile. Also, avoid adding pet waste from dogs or cats, as it can contain pathogens harmful to humans. Finally, steer clear of diseased or insect-infested plants, as the composting process might not get hot enough to kill the pathogens, which could then be spread back into your garden.
Troubleshooting common composting problems
Even with the best intentions, you might run into a few bumps on your composting journey. Fortunately, most common problems have simple solutions. One of the most frequent complaints is a bad smell. If your pile smells like ammonia or rotting garbage, it’s a sign that things are out of balance. This is almost always caused by too many ‘greens’ (nitrogen) and not enough ‘browns’ (carbon), or too much moisture. The fix is simple; stop adding greens for a bit and mix in a generous amount of dry, brown materials like shredded leaves, cardboard, or sawdust. This will absorb excess moisture and restore the carbon-nitrogen balance. Another common issue is a pile that just isn’t breaking down. If your compost seems inactive, it’s likely either too dry or it’s lacking nitrogen. Check the moisture level by grabbing a handful of compost. It should feel like a wrung-out sponge. If it’s dry, add some water with a hose or watering can and mix it in. If moisture isn’t the issue, you probably need more ‘greens’. Try adding fresh grass clippings or a larger amount of kitchen scraps to kickstart the microbial activity. Pests can also be a concern. To deter critters, make sure you are not adding any meat, dairy, or oily foods. It’s also a good practice to bury your fresh kitchen scraps in the center of the pile, covering them with a layer of finished compost or brown materials to hide the scent.
Harvesting and using your homemade compost
After months of patience and layering, the most rewarding moment arrives; harvesting your black gold. You’ll know your compost is ready when it is dark brown or black, has a crumbly texture similar to rich soil, and smells earthy and pleasant, like a forest floor. You should no longer be able to identify the original materials you put in, although you might find a few tougher items like avocado pits or corn cobs that can be tossed back into the bin to continue decomposing. To harvest from a simple pile or bin, you can simply shovel the finished compost from the bottom of the pile, where the oldest material resides. You can use it as is, or you can sift it through a screen of half-inch hardware cloth to create a finer, more uniform product. Once harvested, the uses for your homemade compost are nearly endless. It is a superb soil amendment. Mix it into the soil in your vegetable garden or flower beds before planting to provide a slow-release source of nutrients and improve soil structure. For existing plants, you can use it as a top dressing, simply spreading a one or two-inch layer around the base of the plants and letting rainfall and worms work it into the soil. It’s also perfect for revitalizing potted plants. Mix it into your potting soil at a ratio of about one part compost to three parts soil. You can even make a ‘compost tea’ by steeping a bag of finished compost in water for a day or two, creating a liquid fertilizer that your plants will love.
The journey from a humble potato peel to a handful of rich, life-giving compost is a powerful lesson in transformation. By embracing this simple method, you are doing far more than just making soil. You are actively reducing your contribution to landfills, cutting down on greenhouse gas emissions, and eliminating the need for chemical fertilizers in your garden. This practice is a tangible expression of a green home lifestyle, connecting you directly to the cycles of nature and the food you grow. It closes a loop within your own household, turning what was once considered waste into a valuable resource that nurtures new life. The secret of the soil maker is not complex or difficult; it is an invitation to participate in a natural, regenerative process. It demonstrates that small, consistent actions performed at home can have a profound positive impact on our environment. So take a look at your kitchen bin, see the potential within, and begin your own journey of creating black gold. Your garden, and the planet, will thank you for it.